How do I setup my Samsung KME account with TinyMDM?
“Knox Mobile Enrollment” is a simplified enrollment process for Samsung devices. On first start-up, the devices check whether they have a specific configuration. If so, the fully managed device configuration process is launched, the right MDM is downloaded (here TinyMDM) and the device configuration is completed.
Prerequisites:
- Having a TinyMDM account with a policy created. How to create a policy?
- Having Samsung devices running Android 10 or higher. Lower versions are no longer compatible with KME. For more info.
To benefit form this type of enrollment, you must:
- Create a Samsung KME account with your professional email address. You will receive a customer ID linked to your console, which you will need to communicate later when ordering terminals.
- Choose an authorized terminal reseller and place your order by communicating your customer ID. The reseller, in the process of routing the ordered terminals, will load these terminals into your console: you will see them appear in your Knox Mobile Enrollment account and can start your settings below.
Step 1: Connect to your KME account

If you don’t have a KME account, you can create one here.
The reseller will assign Samsung devices to your account, you only need to provide your KME client number to the reseller.
Memo: you can also use Knox Deployment application to report other devices via Bluetooth, NFC or Wi-Fi.
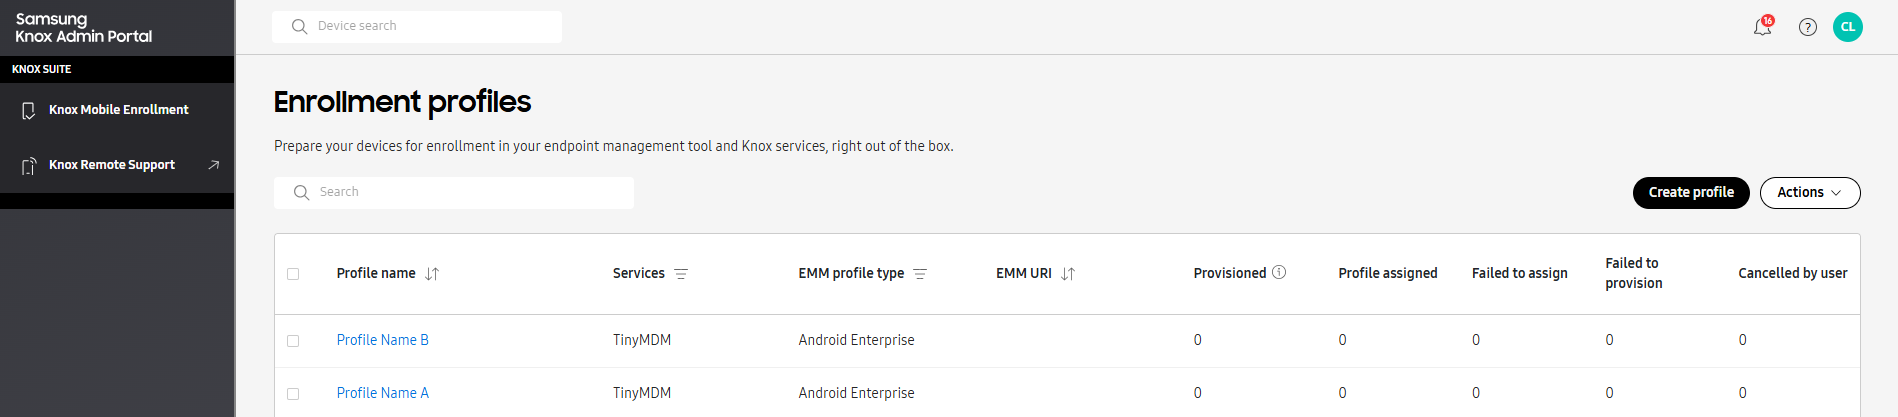
Step 2: Create a MDM profile
- In Profiles, click on Create Profile.
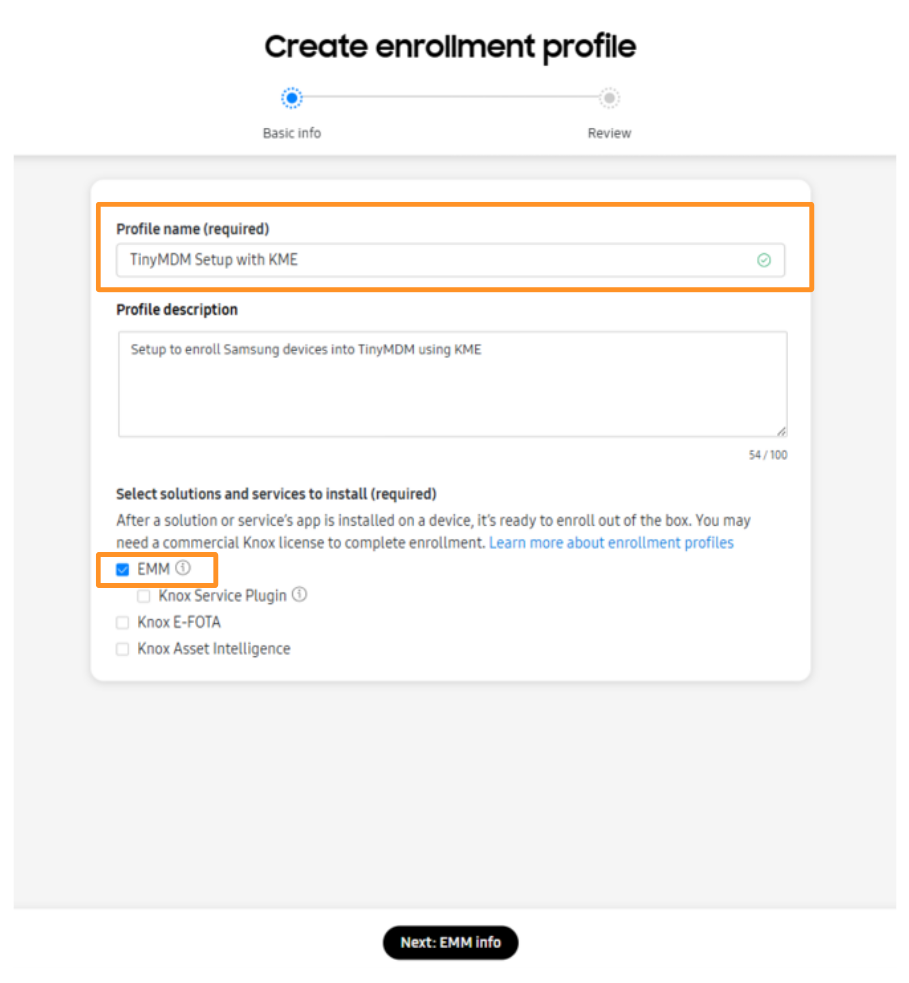
- Enter your MDM profile name and your company information in the description. Next, under Select solutions and services to install (required), check EMM and then click the Next: EMM Info button.
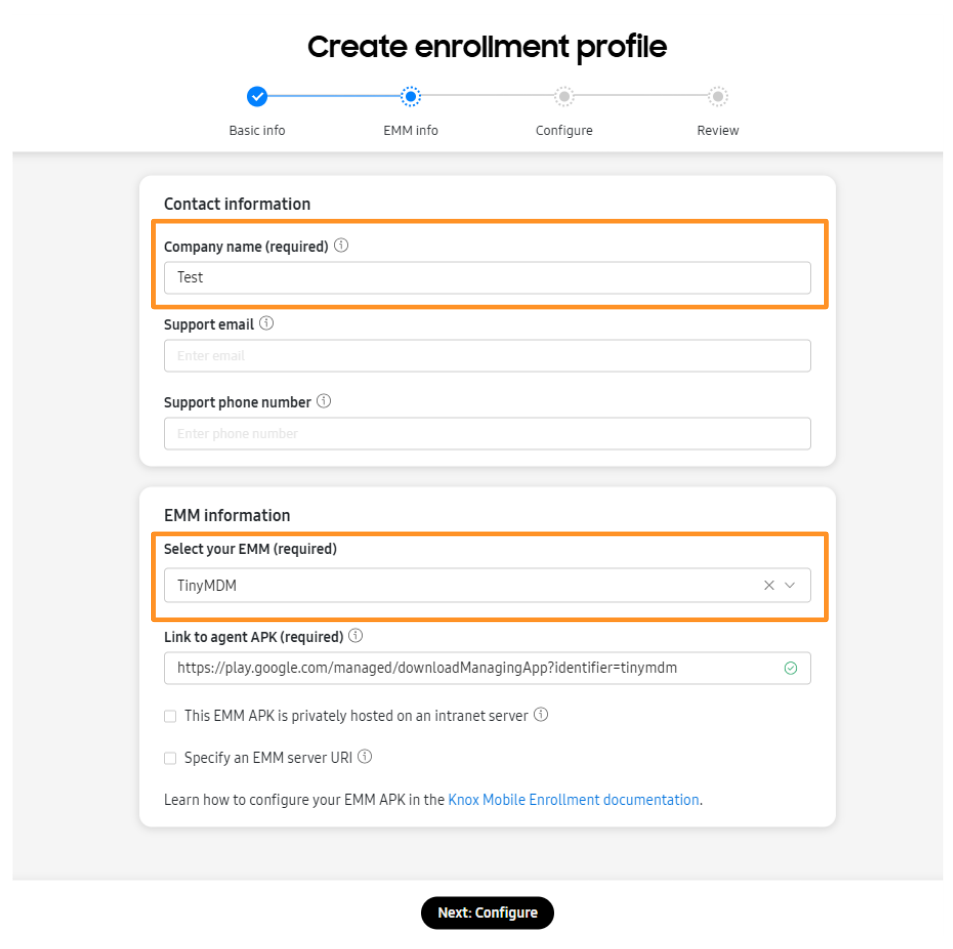
- In the Company name (required) field, enter your company name. Then, in the Select your EMM (required) dropdown list, select TinyMDM. The page will load for a few seconds. Once it’s finished loading, click the Next: Configure button.
- In the next window, under DPC extras for TinyMDM:
1. If you want to enroll your devices in Fully Managed (or Kiosk mode), enter the text below by replacing XXXXXXXXXXXXXXXX by the TinyMDM policy’s ID that you want to apply on the devices (visible in your TinyMDM console > Policies tab). Be careful of the case-sensitiveness.
If needed, you can also link your devices to a group of users, itself linked to a policy. To do this, you need to create a group in your TinyMDM console (follow this tutorial if necessary), link it to a policy and then, in your KME console, replace XXXXXXXXXXXXXXXX with the id of the group created (visible in your TinyMDM console, Users and Groups tab -> Groups sub-tab). Be careful of the case-sensitiveness.
{"enrollmentId":"XXXXXXXXXXXXXXXX"}2. If you want to enroll your devices in WPCO mode (compatible only from Android 11 and newer versions), enter the text below by replacing XXXXXXXXXXXXXXXX by the TinyMDM policy’s ID that you want to apply on the devices (visible in your TinyMDM console > Policies tab). Be careful of the case-sensitiveness.
If needed, you can also link your devices to a group of users, itself linked to a policy. To do this, you need to create a group in your TinyMDM console (follow this tutorial if necessary), link it to a policy and then, in your KME console, replace XXXXXXXXXXXXXXXX with the id of the group created (visible in your TinyMDM console, Users and Groups tab -> Groups sub-tab). Be careful of the case-sensitiveness.
{"enrollmentId":"XXXXXXXXXX", "provisioningMode":"work_profile_on_fully_managed"}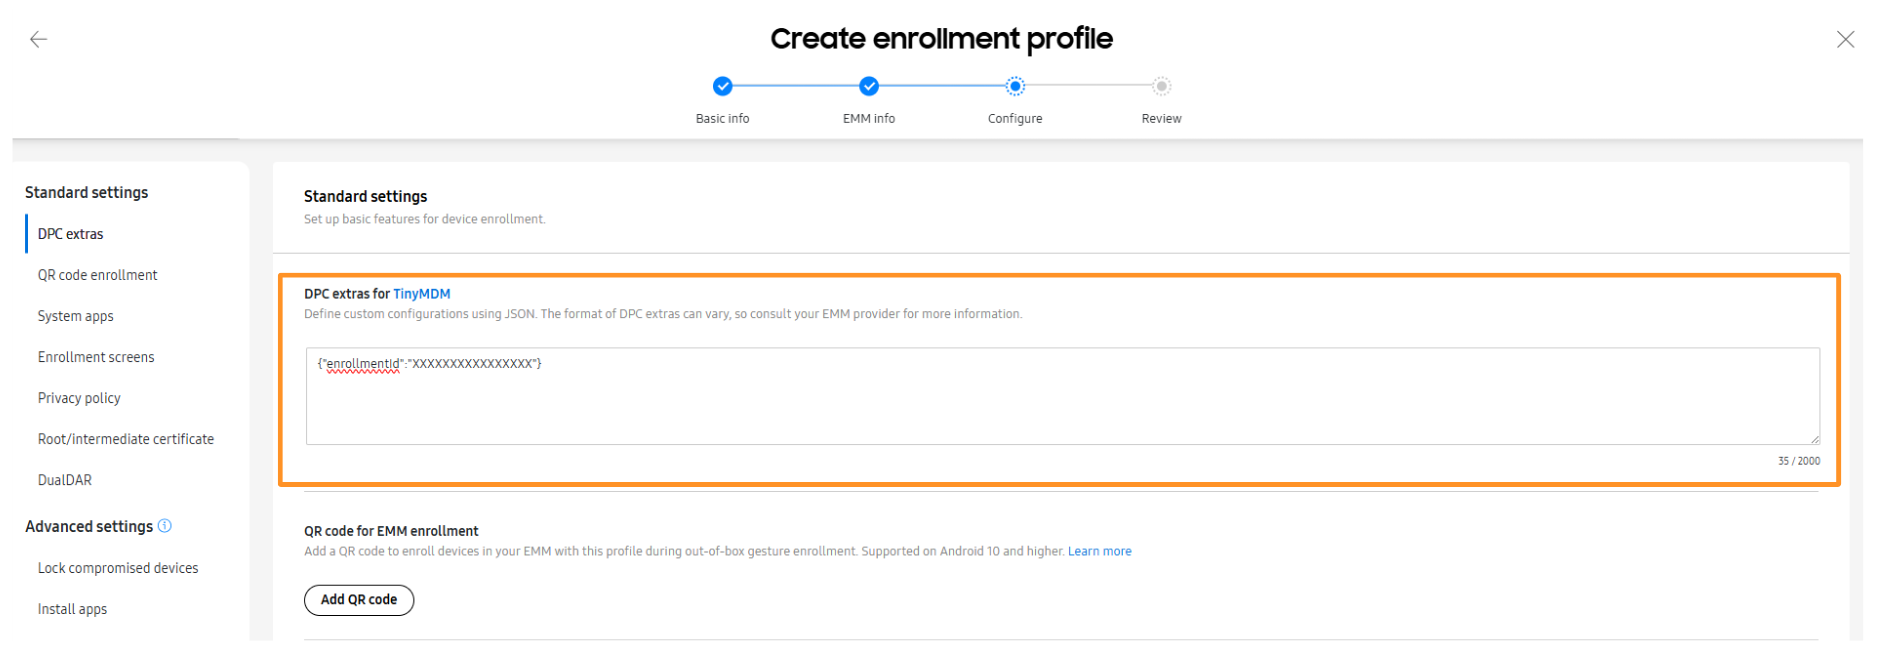
- In System apps, click on Disable system applications (by default). You will later be able to activate them one by one from your TinyMDM console. Click on Next: Review.
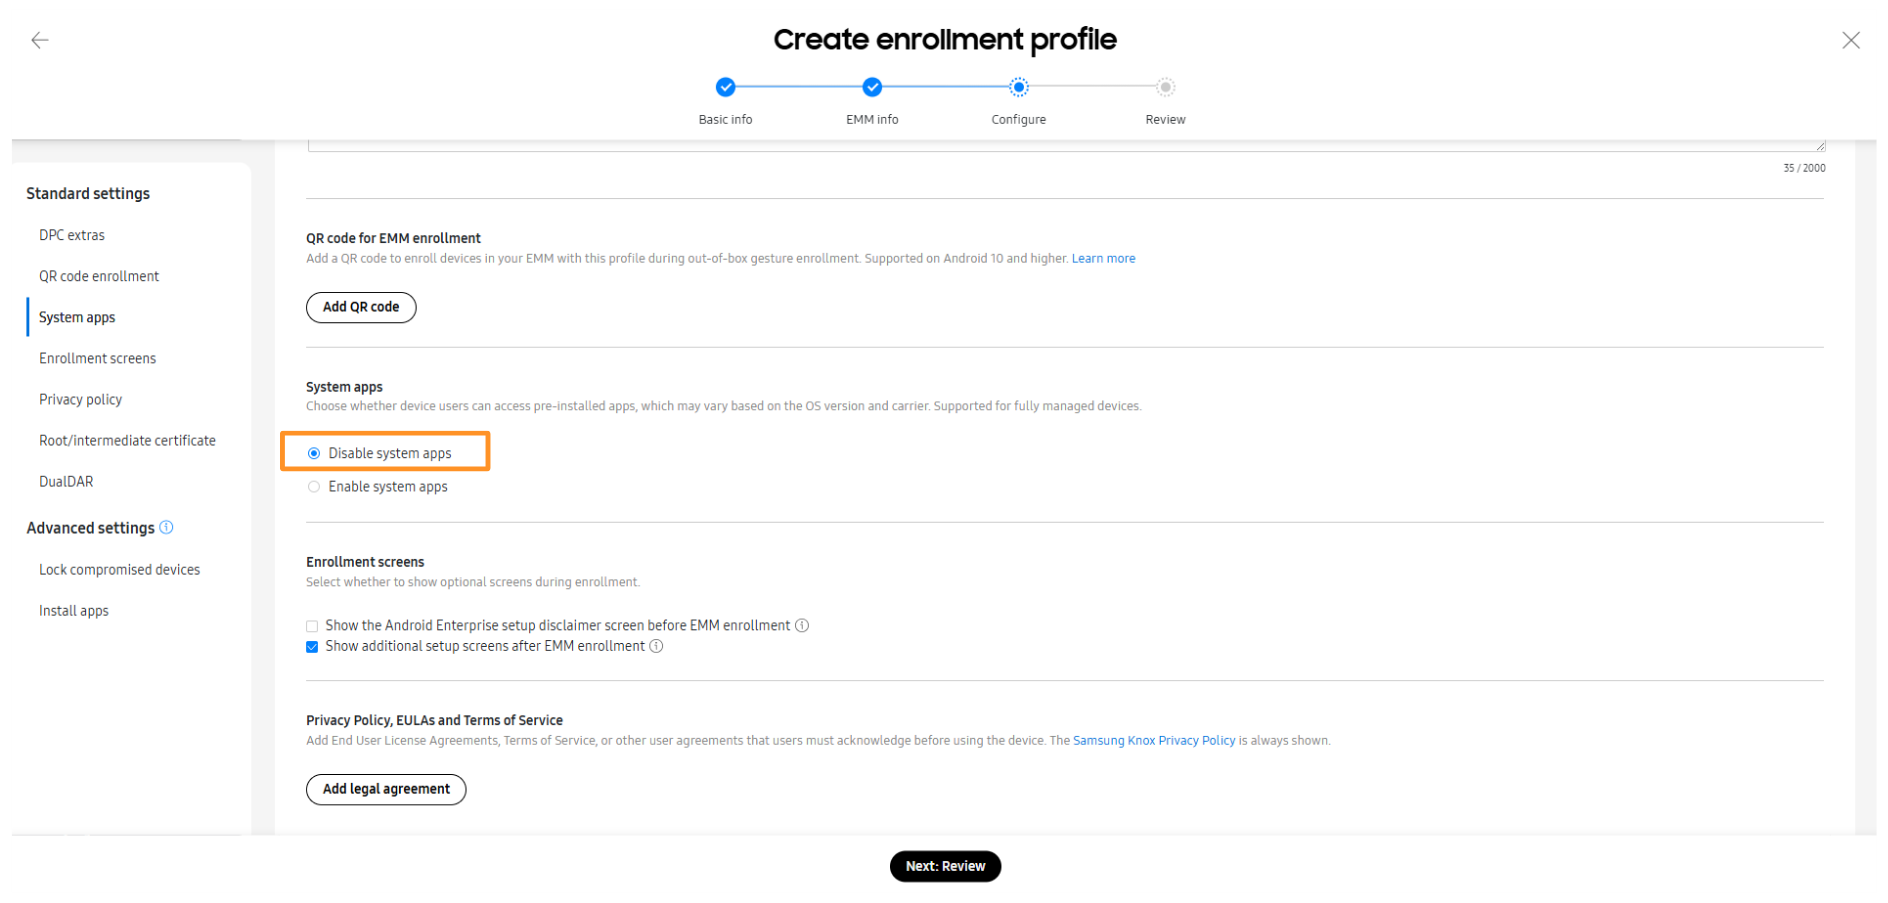
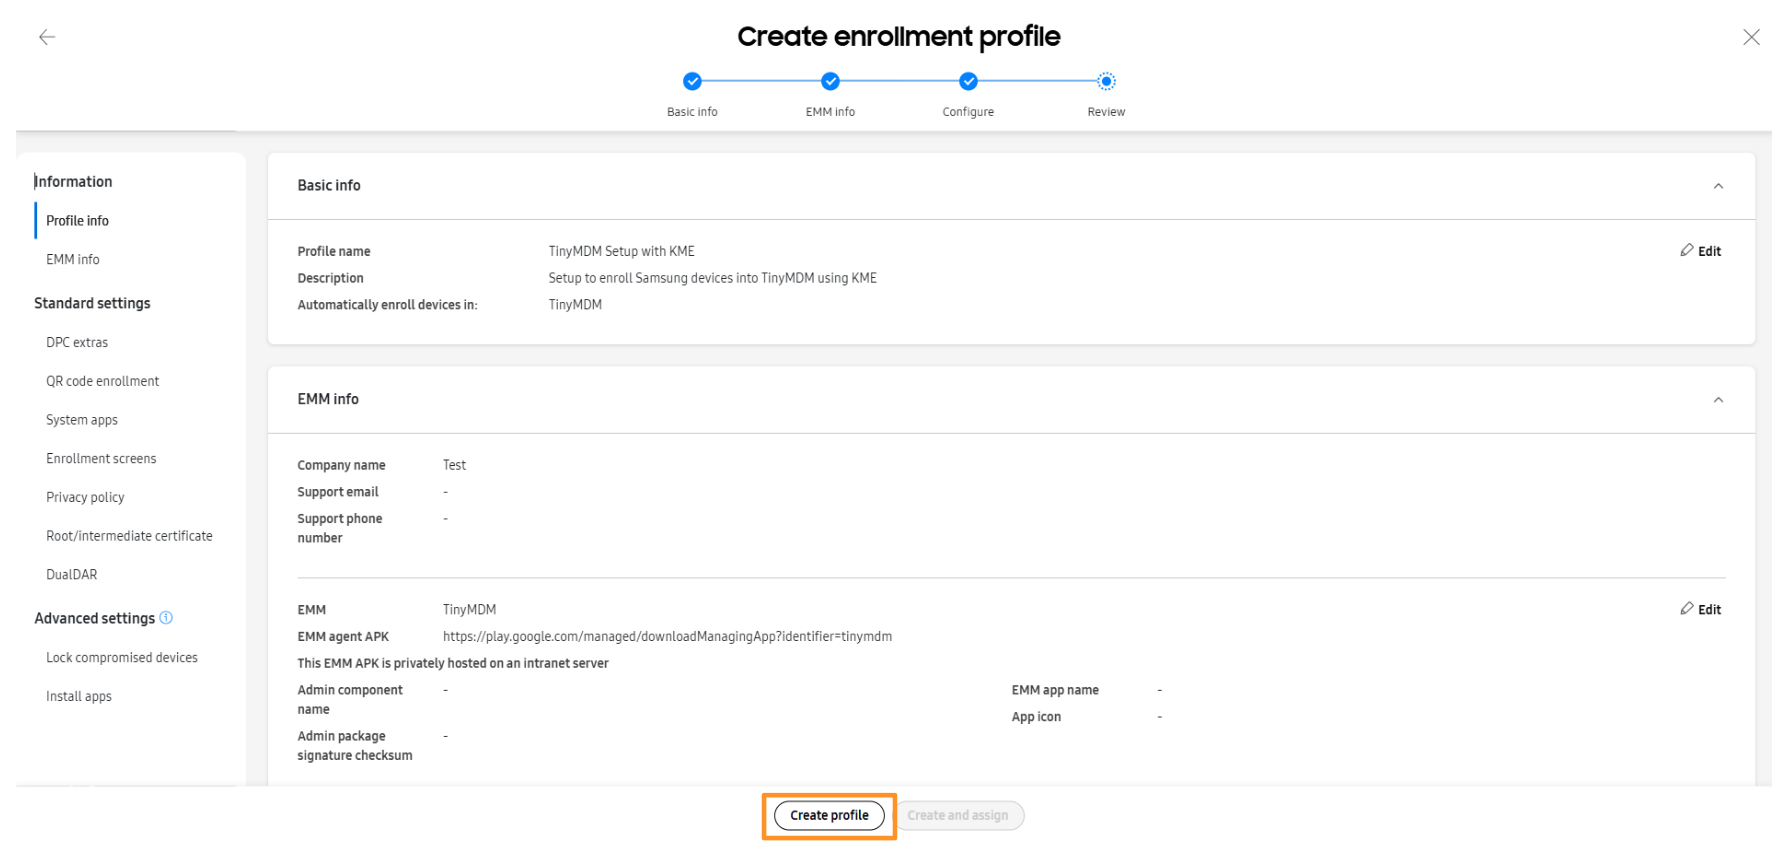
- Review all the info you entered and click on Create profile.
Step 3: Link devices to their user using a CSV file
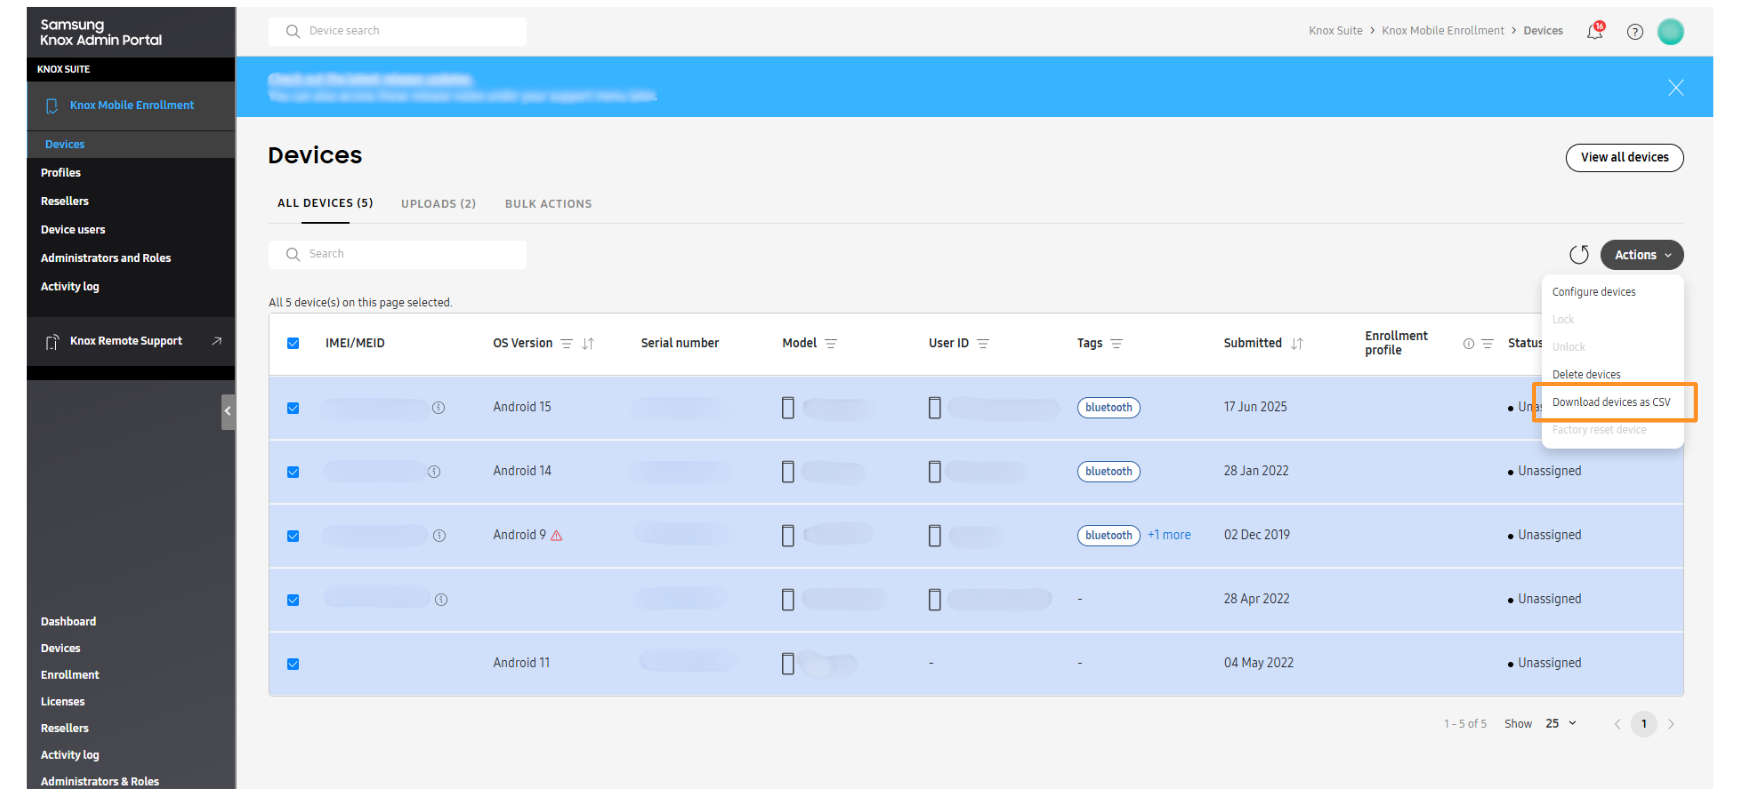
- In Devices tab, select the devices that you want to configure and click on Download devices as CSV to create the list of devices.
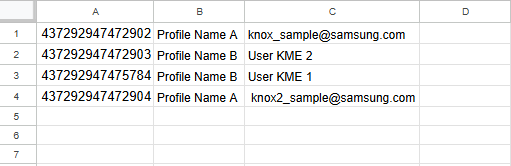
- Open and modify the file in a Microsoft Excel or Google Sheets format, with a line per device:
- First column: enter the device ID (its IMEI or serial number)
- Second column: enter the KME profile you want to associate with the device. For example, the one you just created during Step 2 of the tutorial.
- Third column: enter the email or username for the device. This information will appear in the Users and Groups tab of the TinyMDM administration console.
- Delete the remaining content from the other columns, ensure no lines are added for headers, and leave no empty lines.
- The CSV file content should be as follows:
- Save it as a CSV file (Files > Save as…), then in Save as type line, replace Excel document by .CSV file (comma).
Warning:
- If an email entered in the created CSV file is the same as that of a user already present in the TinyMDM administration console, the enrollment of that device will be blocked.
- If one of the usernames in the created CSV file is the same as that of an anonymous user already present in the TinyMDM administration console, the enrollment of the device in question will be blocked.
Il faudra alors recréer un fichier CSV et resuivre les étapes du tutoriel à partir de l’étape 3 pour cet appareil.
Step 4: Apply the MDM profile to your Samsung devices
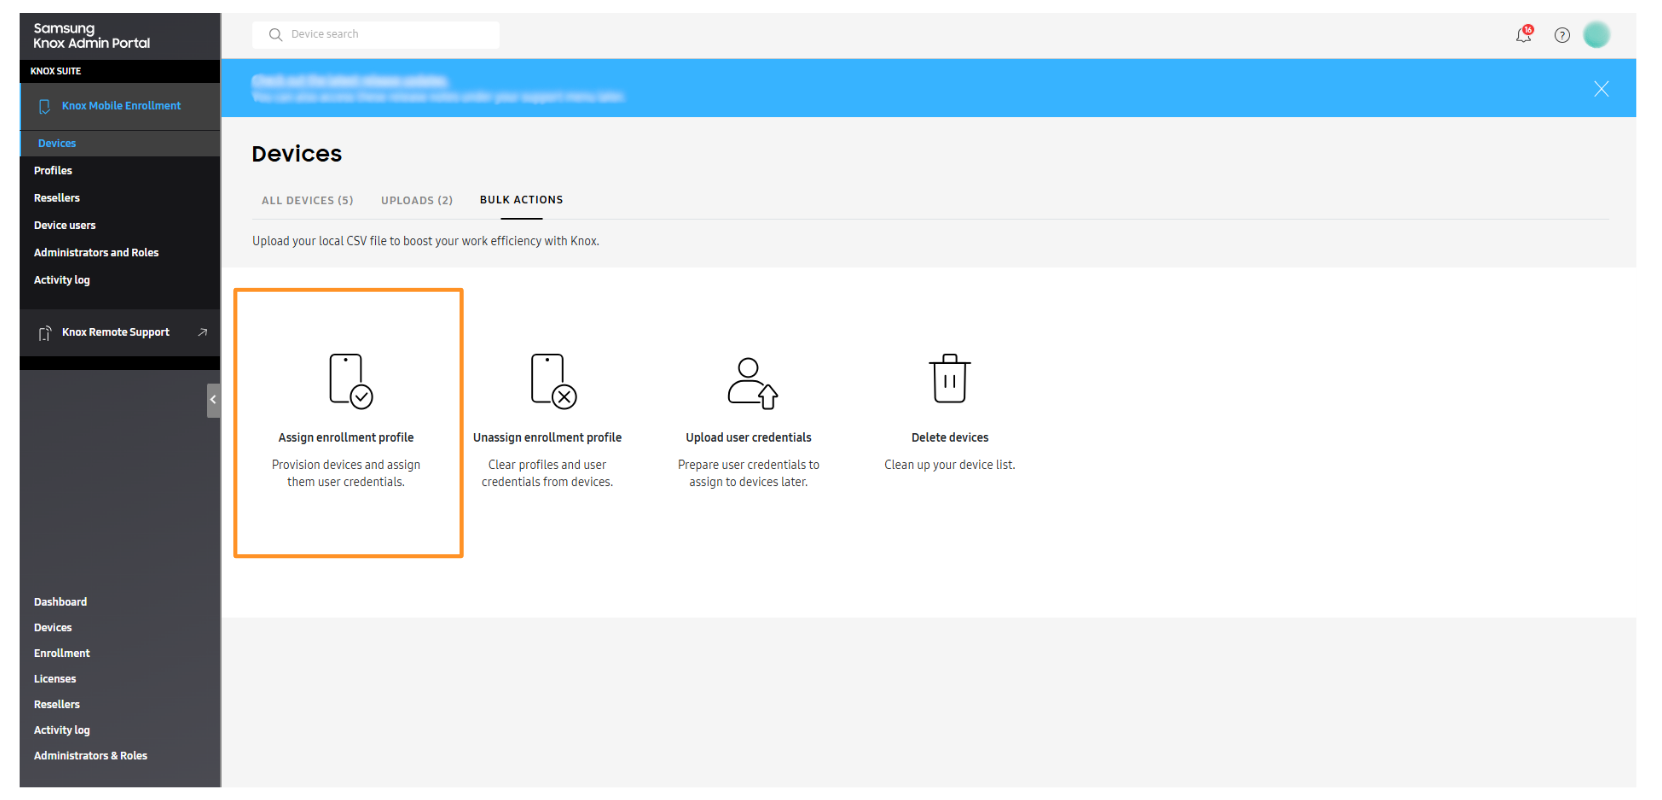
- To apply the TinyMDM configuration to your devices, in the Devices tab click on Bulk Actions (on the top line).
- Then, click on Assign enrollment profile
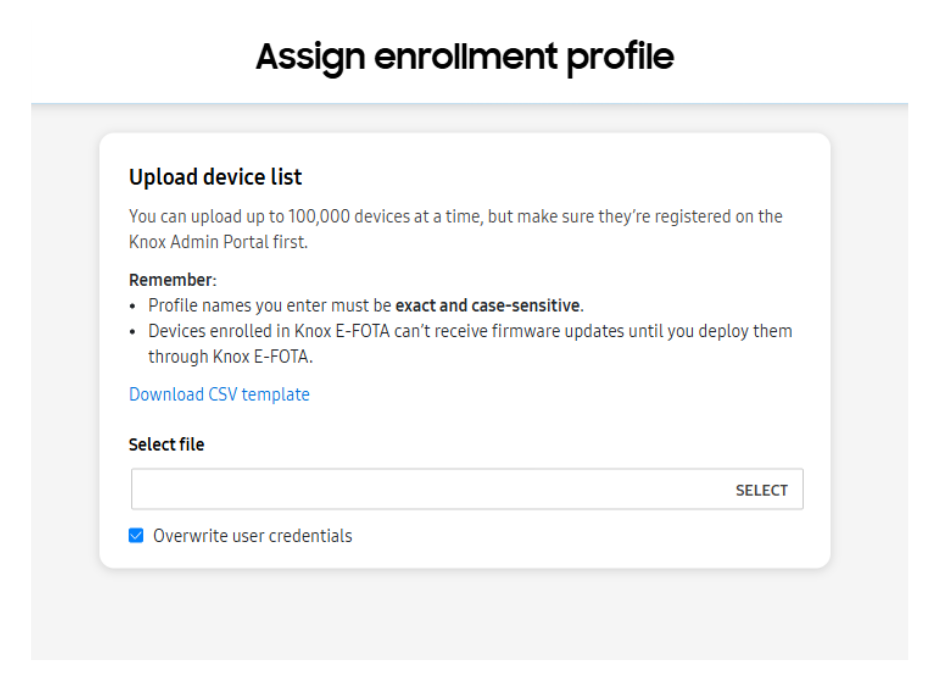
- Import your CSV file (all devices must pre-exist in the inventory) to validate the action:
Step 5: Devices are managed on first startup
Warning: The enrolment of devices via Knox Mobile Enrolment is done without scanning a QR code. If devices registered in a KME console are enrolled by scanning a QR code, it will be as if they were enrolled twice. The device will then be in an unstable state before being automatically reset.
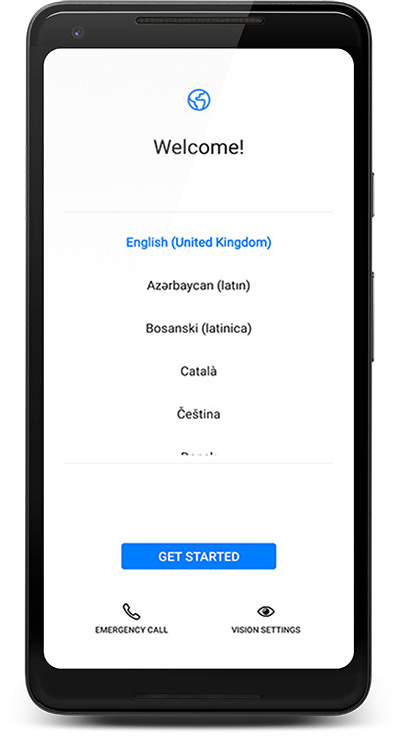
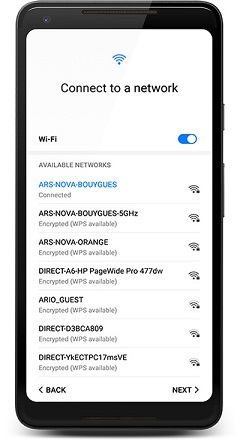
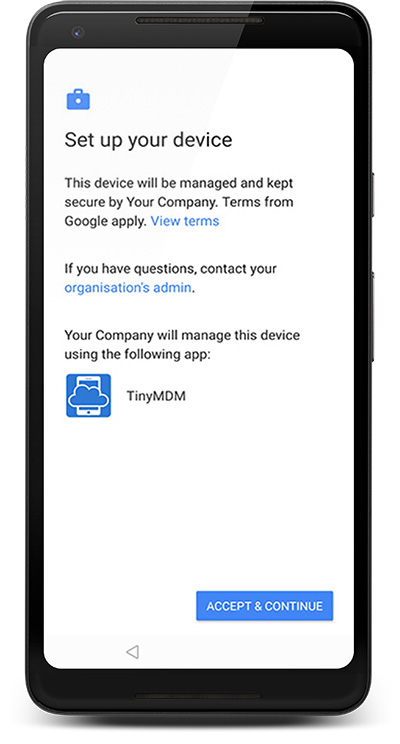
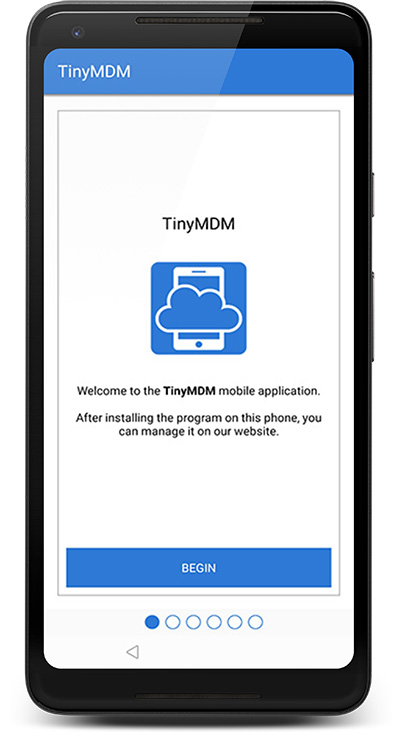
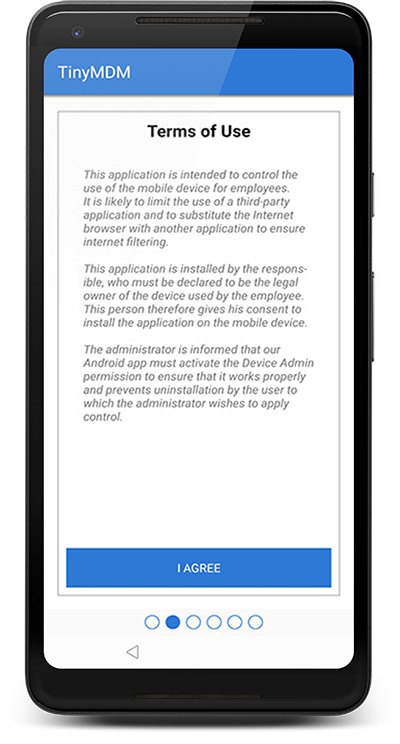
Devices are managed directly straight out of the box. On first startup, the devices check whether a specific configuration has been assigned to them, then download TinyMDM application and complete the configuration. See the steps below:


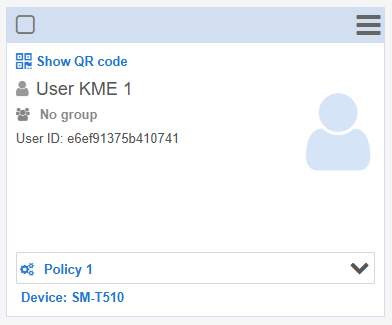
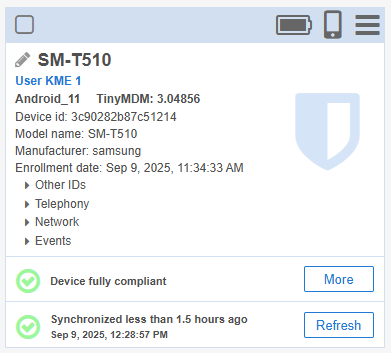
Step 6: Devices and users are in your TinyMDM account
Bonus: Apply multiple MDM profiles via a single CSV file
With the new option available in Knox Mobile Enrollment (KME), it is now possible to associate multiple MDM profiles with a single CSV file. This feature is particularly useful for customers enrolling devices in different management modes (such as WPCO mode and fully managed mode) via KME. By centralizing the management into a single CSV file, you can avoid creating multiple files for each profile, simplifying the process.
To achieve this, in Step 2, it is essential to create two distinct profiles. For example, the first profile could be intended for devices you want to enroll in WPCO mode, while the second profile would be dedicated to devices you want to enroll in fully managed mode. This distinction is crucial to ensure that each type of device is configured appropriately.
Next, in Step 3, you will need to enhance the content of your CSV file by adding a third column. This file must include the following information: IMEI or serial number, User ID, and the corresponding profile.

Finally, in Step 4, you will need to confirm this configuration by selecting the option Assign User Credentials and Different Profile. This step finalizes the assignment of credentials and profiles to the relevant devices.
Ensure you choose the correct profile from the beginning, as it will not be possible to change this choice directly once the enrollment is completed. For instance, it is impossible to switch a device from fully managed mode to WPCO mode, or vice versa, without performing a full factory reset of the device.