How to lock my Android devices in kiosk mode?
Android Kiosk Mode is a TinyMDM feature that restricts a device to a single application or a limited set of specific applications. It is often used in business or public environments to restrict access to the device’s functionality. Kiosk mode is ideal for limiting certain devices to a dedicated task: perfect for self-service devices or those used for specific business scenarios.
A. Enable kiosk mode
- On your TinyMDM account, go to the Policies tab and click on Edit to modify the policy of your choice
- Under the Apps management sub-tab, click on Enable Kiosk mode so that all devices in this policy are automatically in kiosk mode..
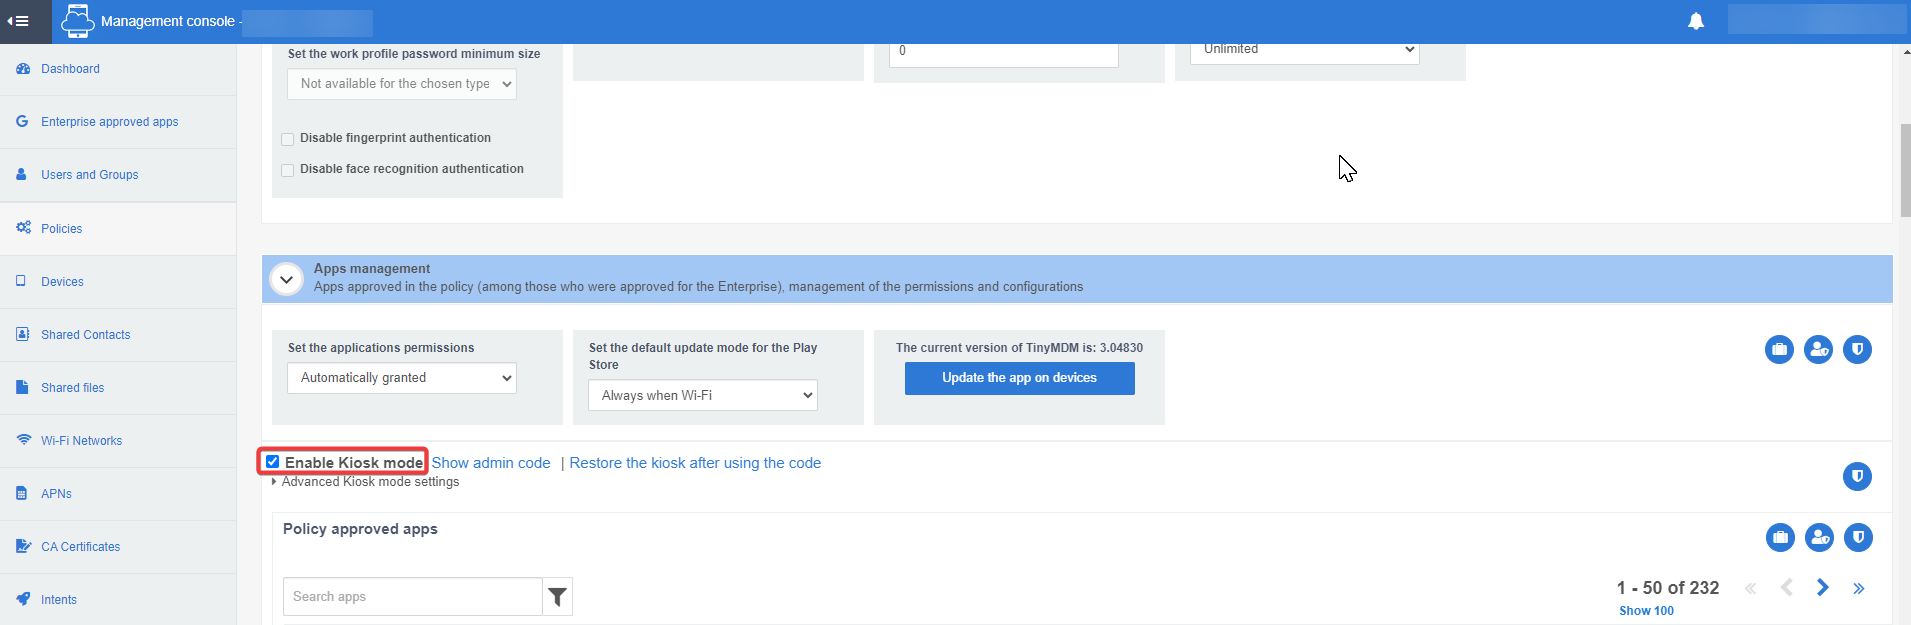
All the devices that are on this policy will automatically switch to classic kiosk mode. If you want to discover more features of the kiosk mode, read the section below.
B. Enable advanced kiosk mode features
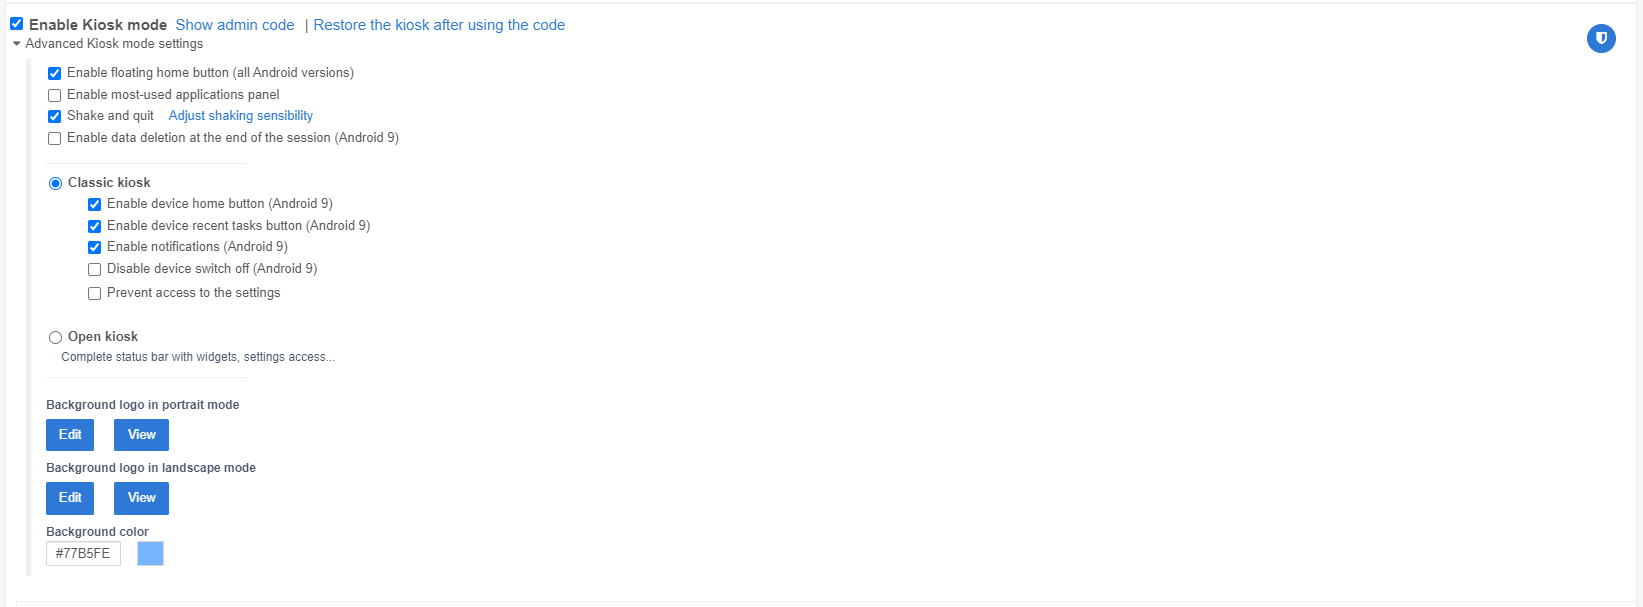
Once you’ve clicked on Enable Kiosk mode, an Advanced Kiosk mode settings bar will appear below it. Open it to discover all the advanced features:
1. General options available 
- Enable Floating Home Button: this will bring up a small floating button to return to the main kiosk screen.
- Enable Most-used applications panel: this will create a banner at the top of the device screen, displaying the most frequently used applications.
- Shake and quit: this allows the user to strongly shake its device in order to quit the kiosk mode (an admin code will be required).
- Enable data deletion at the end of the session: available only from Android 9 or newer versions, this feature allows you to create temporary kiosk sessions, with data deletion at the end of the session.
- Background logo in portrait and landscape mode: you can add an image to appear at the background of the device. The image could be a different one in portrait and landscape mode. Be careful with the size and weight of the image you import.
- Background color: if you choose an image with a transparent background (.png), the color you choose for the background will be visible behind it.
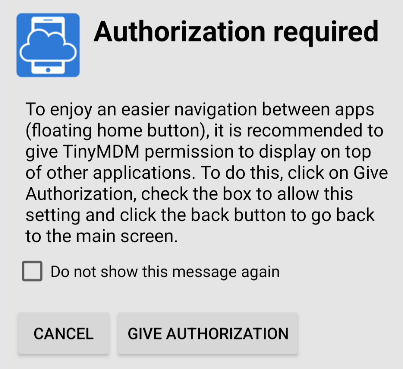
Note: The device may display an ‘Authorization required’ pop-up the first time you activate the Floating home button feature. This pop-up asks you to access your device settings to enable TinyMDM to be overlaid on other applications, which is essential if you want the floating home button to appear. All you have to do is click on ‘Give authorization’, then search for TinyMDM in the list of suggested applications and authorize the application to be overlaid.
2. Two types of kiosk mode
a. Classic kiosk
By default when you activate the kiosk mode, you activate the Classic one. It is the most restrictive kiosk mode, where it is possible to:
- Enable device home button
- Enable device recent tasks button
- Enable notifications: it means that the notifications bar will be visible on the device and the user will be able to see the notifications. If you untick it, the notifications bar will be hidden.
- Disable device switch off: it prevents the device from shutting down so that the user cannot turn it off.
- Prevent access to the settings: there will be no possibility to access the settings on the device
b. Open kiosk
The Open kiosk is a slightly less strict kiosk mode compared to the Classic one. In open kiosk, the user has access to the Android status bar including notifications but also widgets such as Wifi, Bluetooth, airplane mode, flashlight, automatic rotation, etc. Even if all the widgets are visible, the administrator can still block some of them from the policy (such as the airplane mode activation). In Open kiosk, the user has the possibility to access the settings.
Simply click on Open kiosk button to activate it instead of the Classic one.
C. Built-in applications in kiosk mode
When you activate the kiosk mode from your policy, eight applications are added to the list of Policy approved apps. All of them are hidden by default. If you want to enable one, you simply need to click on it to make it visible on the devices. These are the built-in applications:
- Phone application
- Messages application
- Settings application. By clicking on the menu of the application (三), you can display it as a floating widget on the screen.
- Info: it allows users to retrieve the device information (serial number, device ID, TinyMDM version…) or to make some modifications like a policy reload or a deactivation of the kiosk mode using an admin code for example.
- Sim tools
- Exit kiosk: it allows users to exit the kiosk mode, using an administrator code.
- Wifi and Bluetooth: these are shortcuts that lead users directly to the corresponding menu in the device settings.
- By clicking on the menu of those applications (三), you can display them as floating widgets on the screen.
- Regarding the Wi-Fi application, you can authorize the user to open it even if the option “Prevent access to the settings” is enabled, but this configuration will require TinyMDM the permission to geolocate the device. Indeed, on Android systems, access to the Wi-Fi is linked to the geolocation.

We recommend you to always provide a secure way to exit the kiosk mode (such as the Info application, the Exit application, or the Shake and Quit option). This provides a means of exiting kiosk mode in the event that a device loses its Internet connection or encounters a technical problem requiring access to the settings.
D. Other kiosk mode possibilities
In kiosk mode, it is also possible to:
- authorize only one application, by configuring the single app kiosk mode.
- push files on the devices and create shortcuts on the home screen.
- define an application that opens automatically each time the device is unlocked.
- hide applications so that they run in the background but are not directly accessible by the user.
- protect applications with a password so that only authorized users could have access to it.