How to filter internet access and limit access to other browsers?
Note:
- Internet is TinyMDM’s secure browser, allowing you to filter web access through various restriction levels.
- Internet is compatible with all mobile devices running Android 9 and above.
- If multiple browsers are installed on your devices, TinyMDM’s web filtering system will only work with the Internet browser.
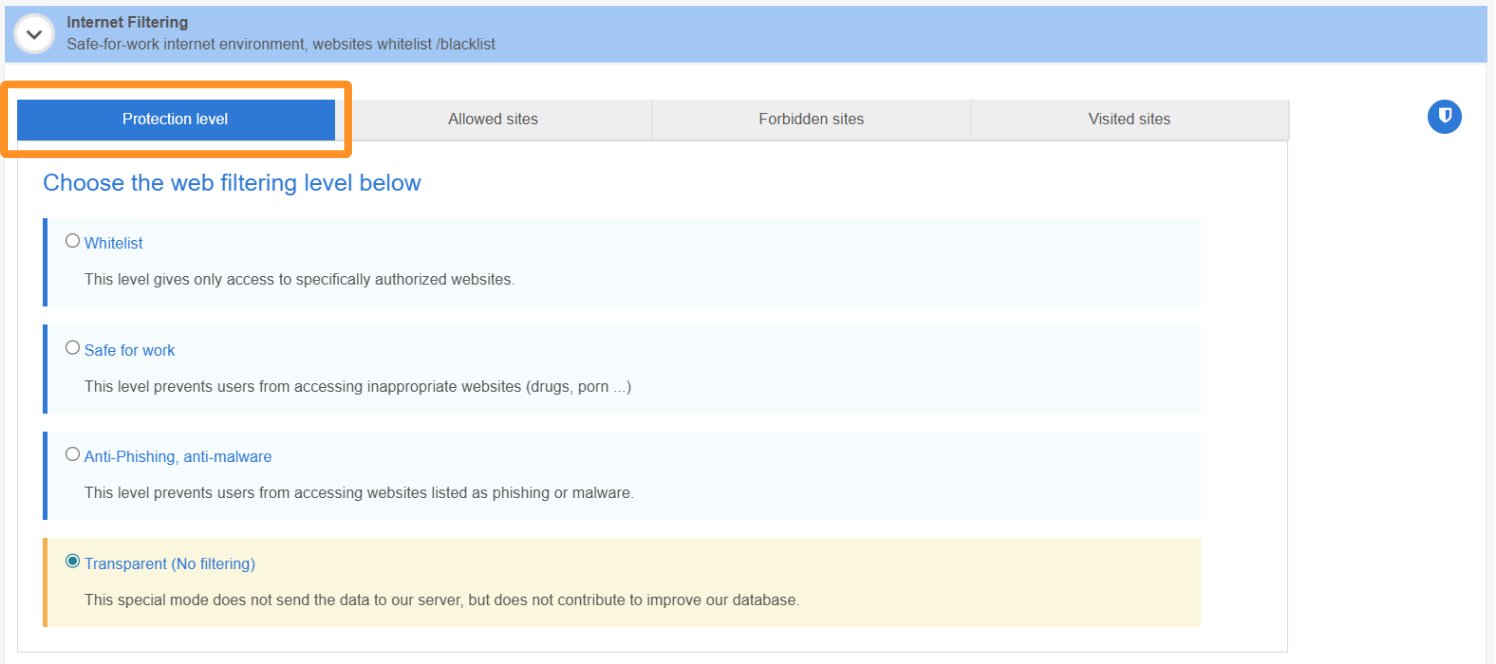
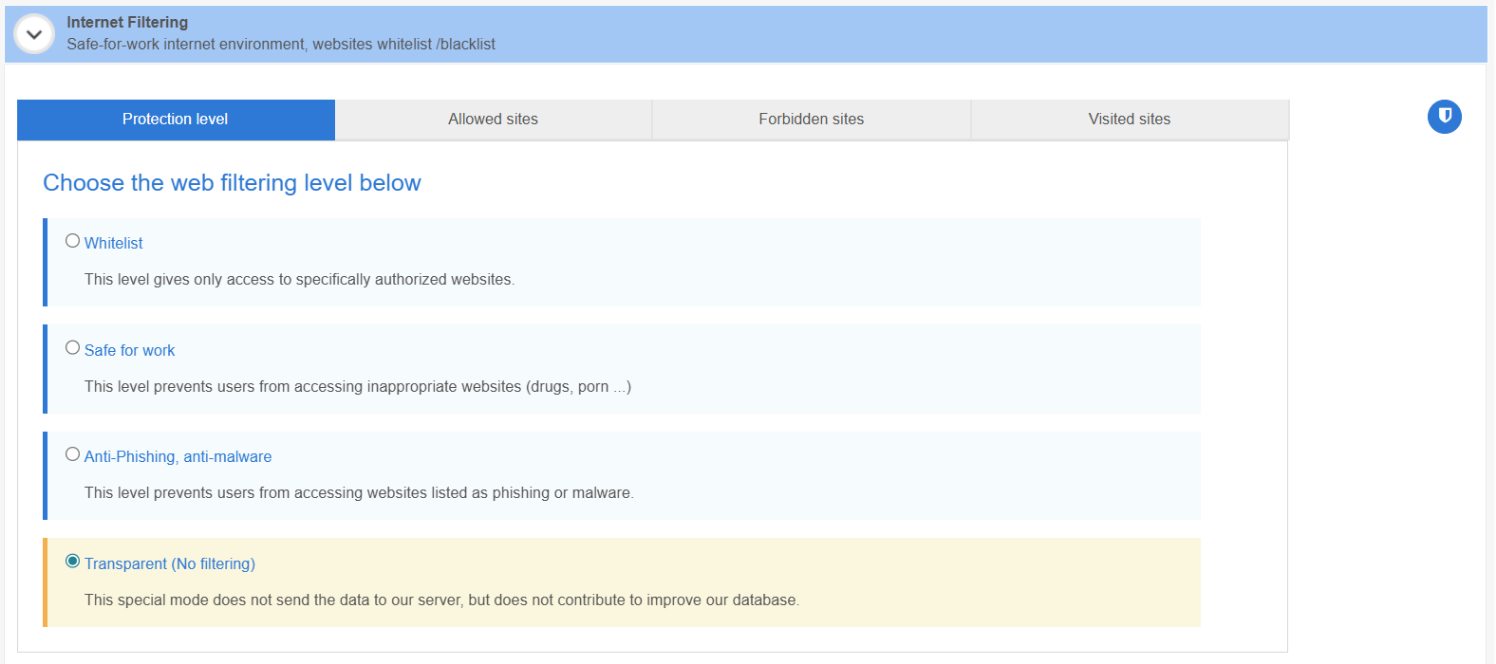
A. Different web filtering levels 
TinyMDM’s patented web filtering system allows you to manage internet access through three distinct filtering levels:
- Whitelist: Restricts access exclusively to sites that have been specifically authorized in advance.
- Safe for work: Blocks access to all websites deemed inappropriate for professional use.
- Anti-Phishing, anti-malware: Prevents access to sites identified as potential sources of phishing or malicious software (malware).
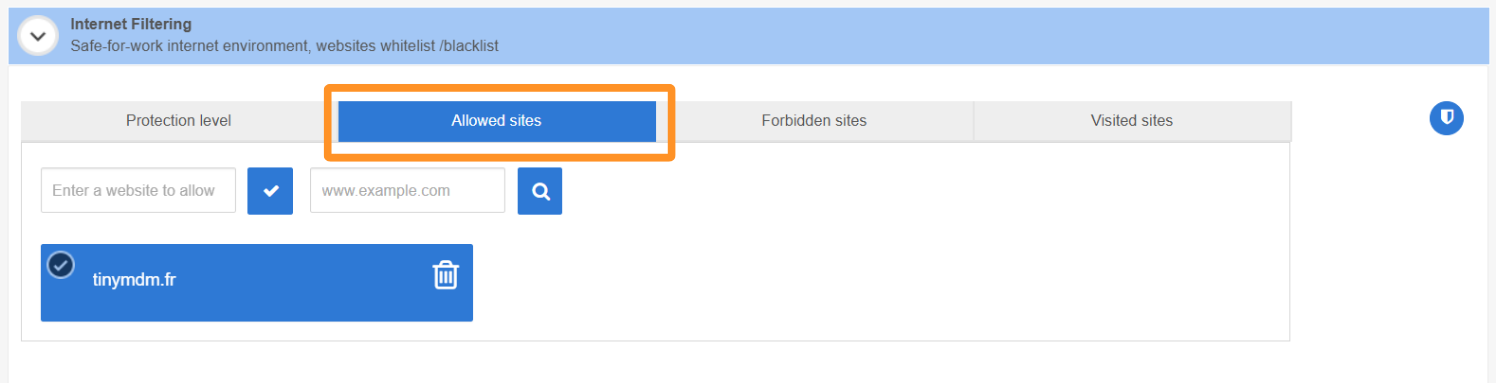
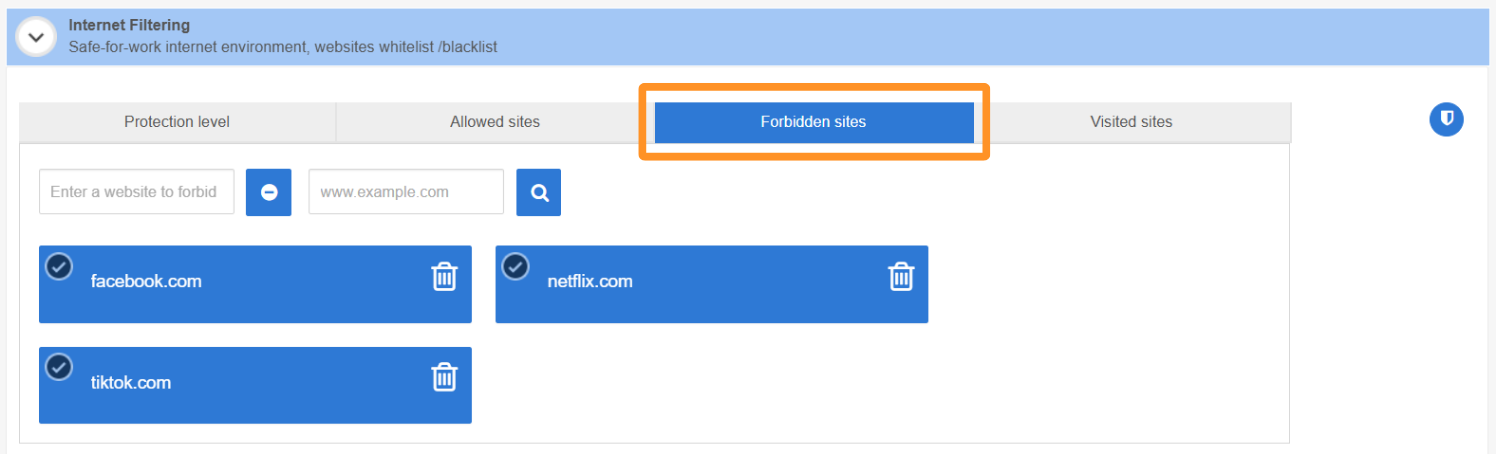
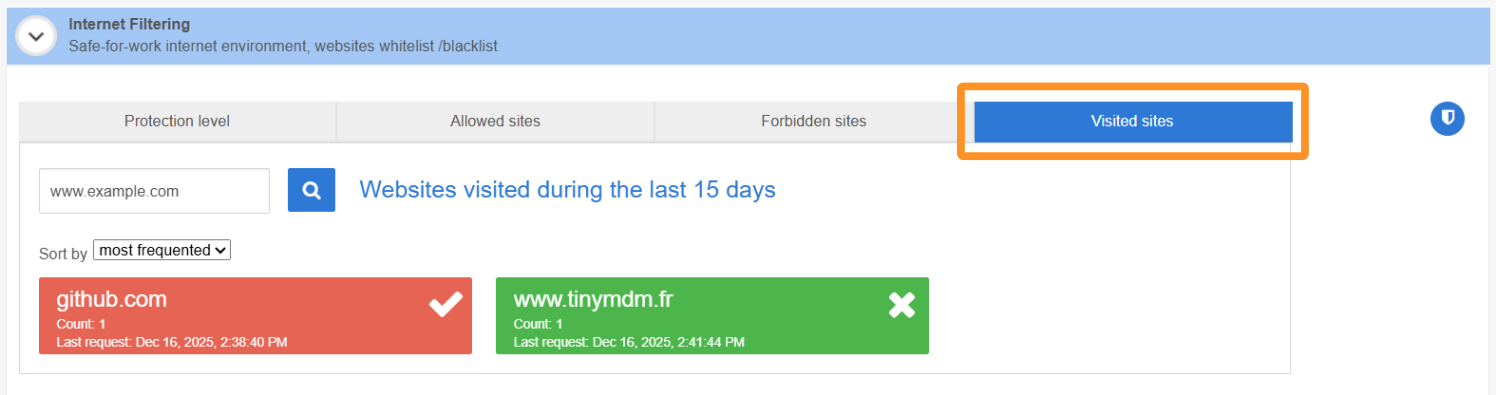
The filtering system also allows you to:
- manually authorize access to specific websites from the Allowed sites tab.
- manually block access to specific websites from the Forbidden sites tab
- view the visited sites of the devices from this policy, using a 15-day browsing history. This feature enables proactive oversight of internet usage, helping to further strengthen network security and prevent potential policy violations.
B. How to install Internet secure browser
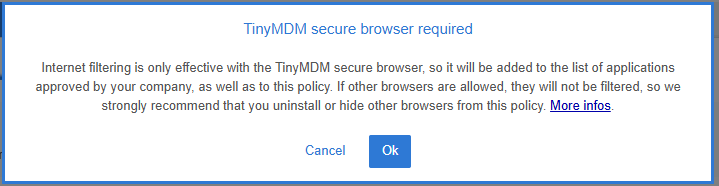
The Internet secure browser is automatically installed as soon as one of the three filtering levels mentioned above is activated. To activate a filtering level and trigger the automatic installation of Internet:
1. Log in to your TinyMDM admin console and go to the Policies tab. Then, click Edit to make changes to the desired policy.

2. Scroll down through the policy to the Internet Filtering sub-tab. By default, the filtering level is set to Transparent mode, meaning no restrictions are in place. To install the Internet secure browser, simply select your desired filtering level.
3. A pop-up will then appear to notify you about the automatic installation of Internet. You need to click on Ok.
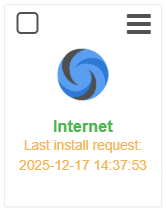
4. Once you have confirmed the pop-up, you will see the Internet app installed within the Policy approved apps. To view it, scroll back up the policy to the Apps Management sub-tab.
Web browsing will then be filtered on all mobile devices under this policy.
If Internet does not install automatically on the devices, you can restart the installation from the Enterprise Approved Apps tab and search for Internet Ars Nova Systems in the public apps. Please follow this tutorial to learn more.
C. If you have an internal website / application
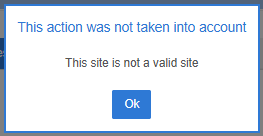
To prevent typos in the URLs entered, TinyMDM always verifies the validity of websites before allowing them to be added to the allowed or forbidden sites lists. If you wish to authorize or block an internal website that TinyMDM cannot access, it will be rejected by default.
To have your internal website/app validated by TinyMDM, you can enter the following prefix before the URL: intra#

D. If you have one or multiple web applications installed
Web Apps that are approved and installed on TinyMDM work only with Chrome browser. That is why it is important not to delete Chrome even if you want to use Internet. However, to prevent users from using Chrome to bypass the secure browser’s filtering, a specific configuration must be implemented.
1. If your devices are in kiosk mode
1. Open the Policies tab and click Edit to make changes to the desired policy.
2. In the Apps Management sub-tab, click the dropdown menu for the Google Chrome app and select Hide app:
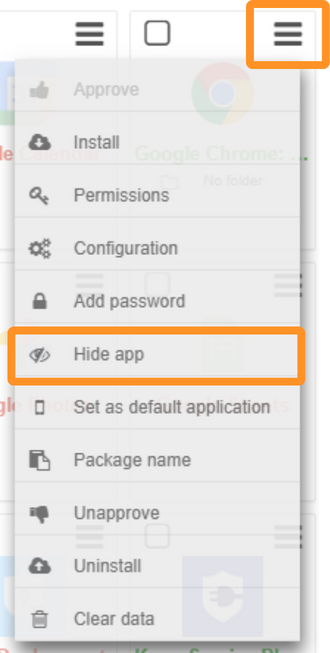
By hiding the Google Chrome app, users will only be able to see web apps but will be unable to browse elsewhere on Chrome. To browse the internet, they will have to use the Internet browser.
2. If your devices are in fully managed mode
In Fully Managed mode, the Chrome app cannot be hidden (like in kiosk mode). To prevent users from browsing freely on Chrome and bypassing the filtering system, follow the steps below:
1. Open the Policies tab and click Edit to make changes to the desired policy.
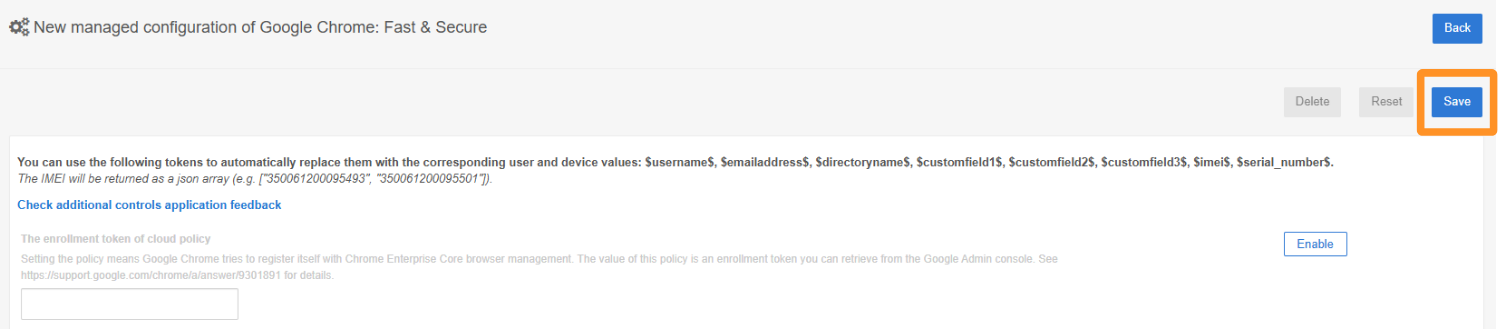
2. In the Apps Management sub-tab, click the dropdown menu for the Google Chrome app and select Configuration:

3. The New managed configuration of Google Chrome: Fast & Secure appear. Search Block access to a list of URLs section and click on Enable.

4. Then enter the text below into the text box:
["https://*", "http://*"]
Due to this configuration, users won’t have access to any internet website on Chrome, including web apps.
5. In order for your web apps to be opened on Chrome, search the Allow access to a list of URLs and click on Enable. The section is right above ‘Block access to a list of URLs’.

6. Then copy and paste the URLs of your web apps:
- If you only have one web app
Type your URL between quotes and square brackets, see example below:
["https://www.siteweb.com"]
Then scroll back to the very top of the policy and click Save for your changes to take effect.
- If you have multiple web apps
Type the URLs of your web apps one by one. They need to be in quotation marks and separated by a comma. Once you did it, put the entire text in square brackets, see example below:
["https://www.siteweb1.com","http://www.siteweb2.fr","http://www.siteweb3.net"]
Then scroll back to the very top of the policy and click Save for your changes to take effect.
With this configuration, when clicking on web apps or the Google Chrome app, users will only be able to access those specific web apps.