How to enroll a fully managed device on TinyMDM thanks to the afw# code?
For information: This procedure does not apply to devices that need to be enrolled in WPCO mode (Work Profile on Company Owned). For these devices, please follow the specific instructions available on the dedicated page.
Prerequisites: Device should be new (or back to factory settings). If your device has a camera, opt for the 6tap enrollment method.
The final user, who received a QR code/password and a link explaining how to do so by email, can complete the enrollment process. Alternatively, the administrator of the account can also complete it.
1. Switch the device on (for the first time) or reset it to factory reset.
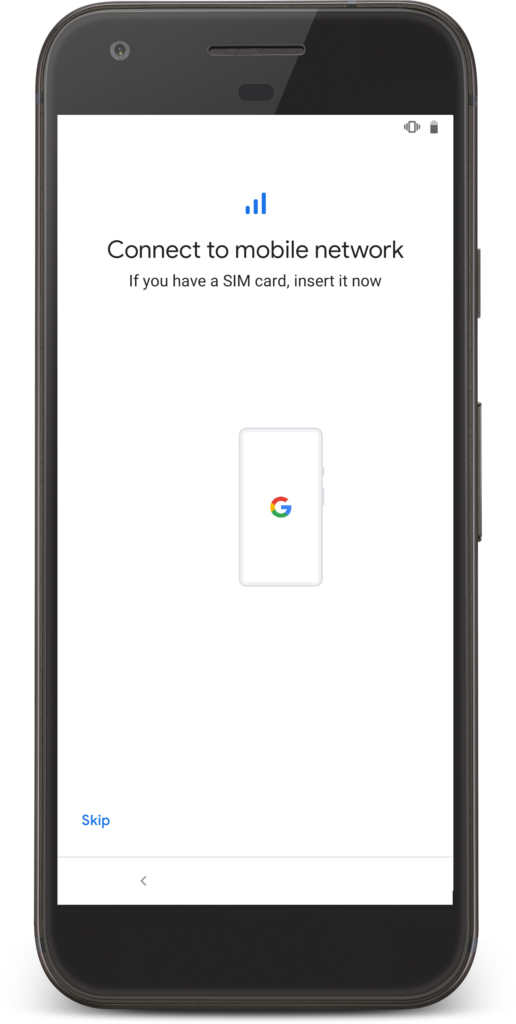
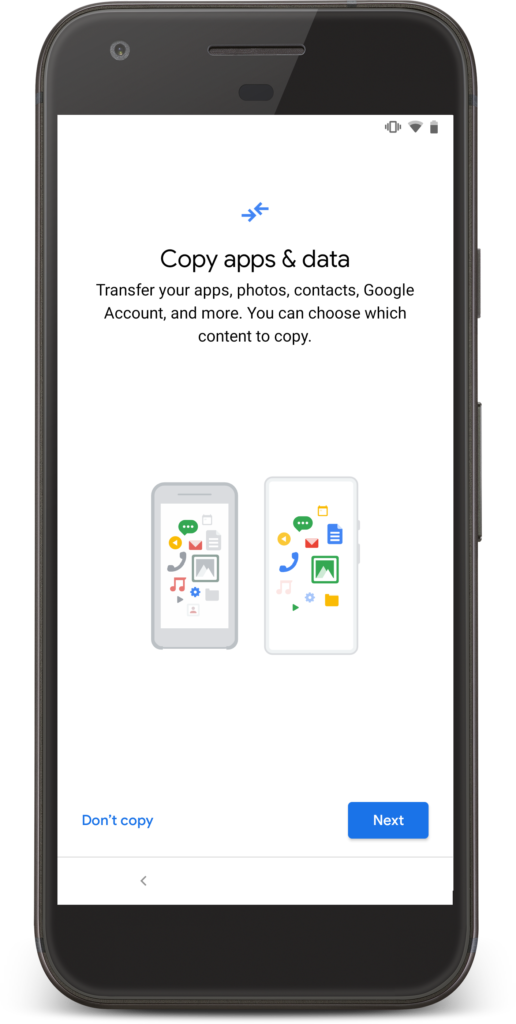
2. Follow the configuration Wizard (startup screen, connect to the wifi, etc. depending of the model). Note: on the “Copy apps & data” screen, choose not to copy data by clicking on “Don’t copy”.


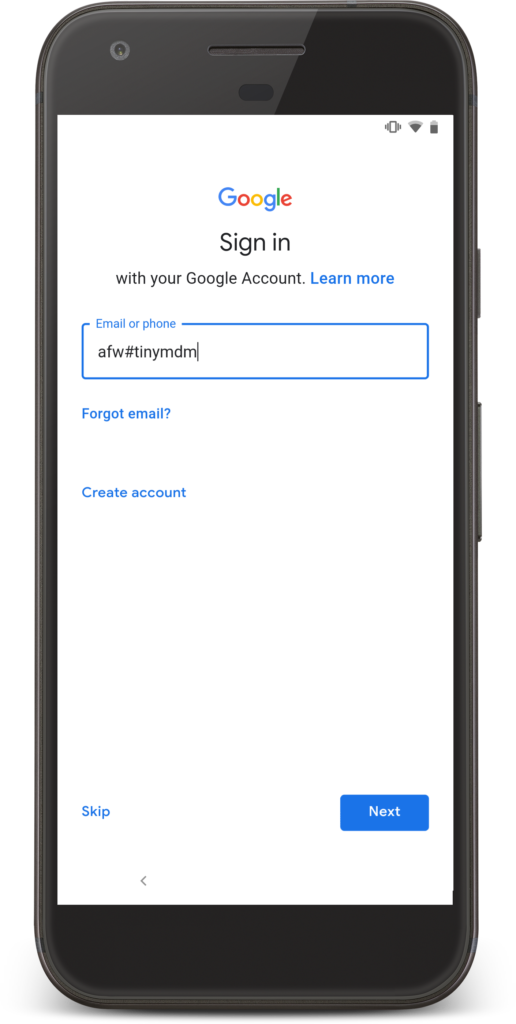
3. On the Google sign in page, enter the code afw#tinymdm instead of an email address.
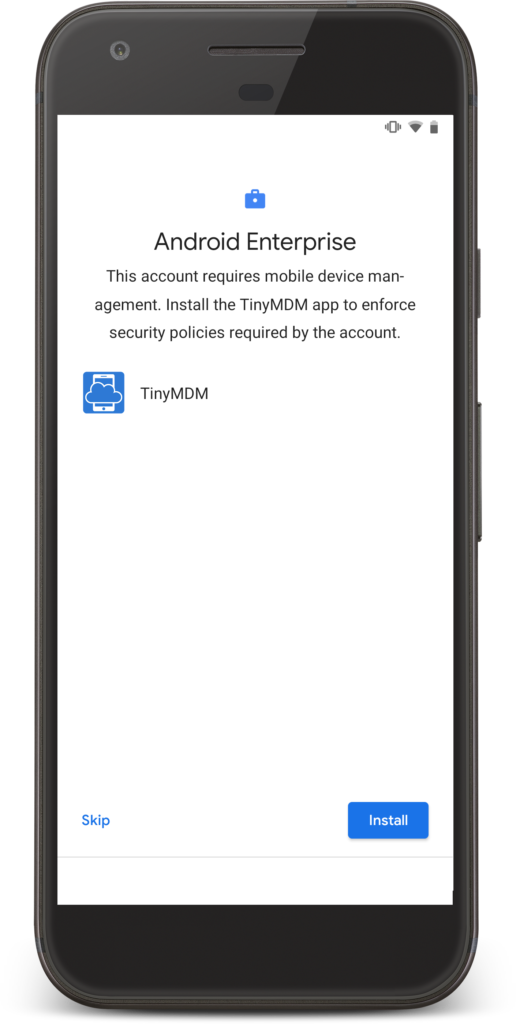
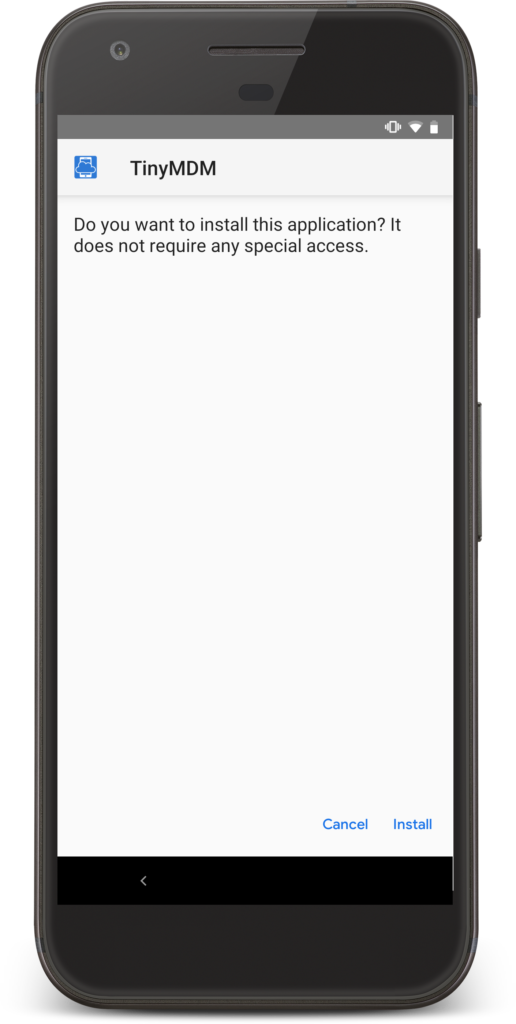
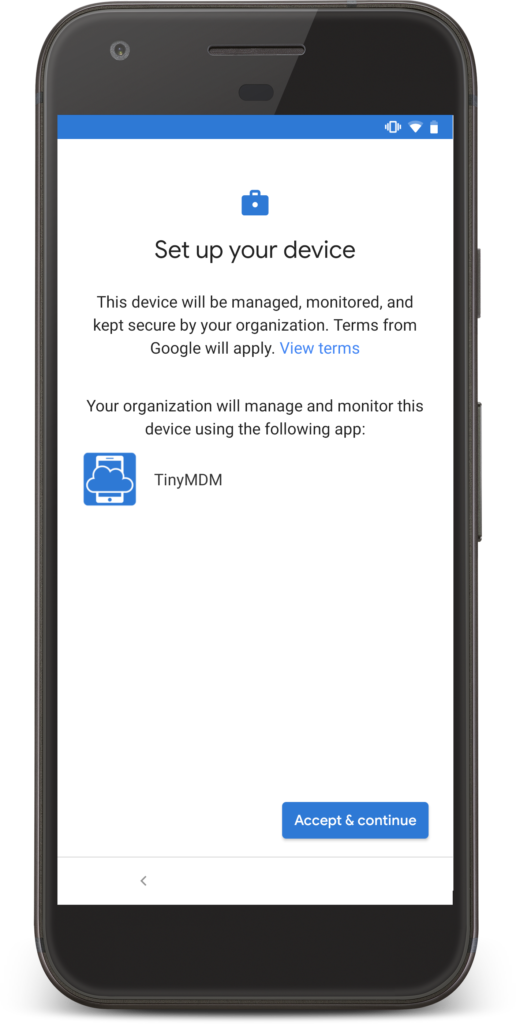
4. Android Enterprise will tell you to install TinyMDM: click on Install and Accept and continue.
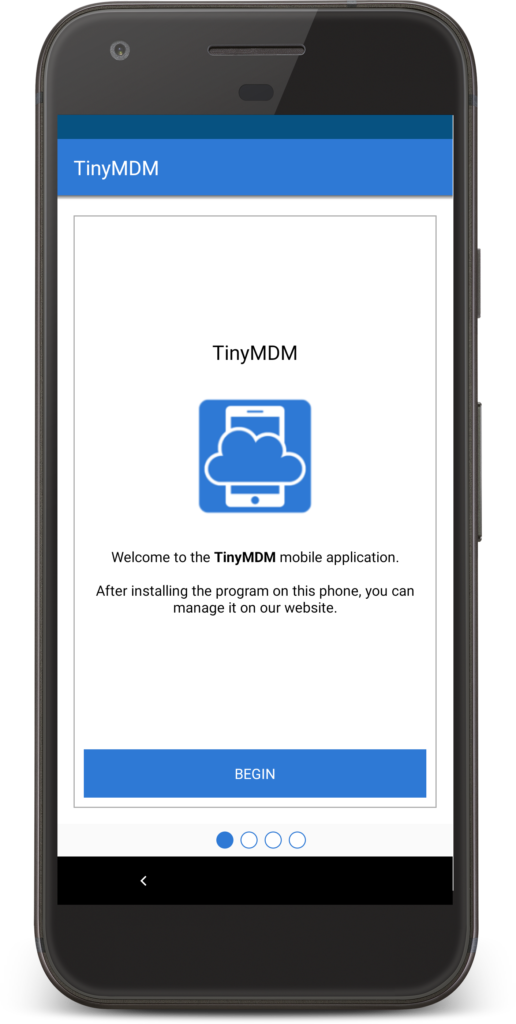
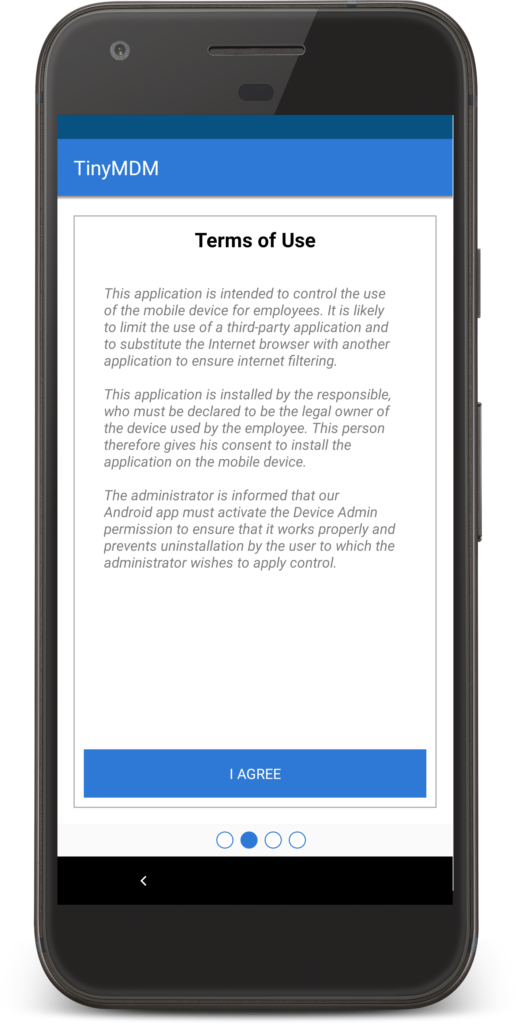
5. Configure TinyMDM: click on Begin and Accept the terms of Use.
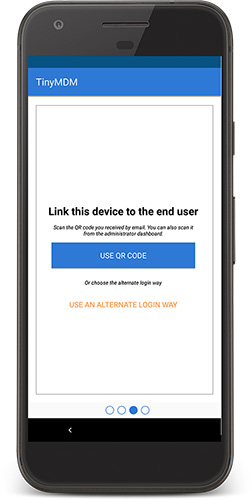
6. Link the device to the end user, by using one of the three methods described below:
- If the device has a camera: scan the QR code, displayed on the user card (or received by email).
- If the device does not have a camera and the administrator does the enrollment: on the device, instead of clicking on Use QR code, choose “Use alternative login way” and then on “Use the login token”. At the same time, on the admin console, click on the user’s QR code and on “No camera on the device?” and enter the token.
- If the device does not have a camera and the end user does the enrollment: on the device, instead of clicking on Use QR code, choose “Use alternative login way”. Fill in your credentials received by email (login and password of the end user, not of the TinyMDM administrator).
Note: Enrollment tokens are valid for 60 seconds. The remaining time is displayed directly below the token. If needed, a new one can be generated using this icon: .
.
7. You’re ready to go! The device is now enrolled and configured as expected in the policy thanks to the afw# code.