How do I configure remote control on Zebra devices via Legacy Zebra OEM Config?
Not supported on Device(s): TC20 and TC25
Prerequisite: if your device is running Android 11 or higher, we suggest you follow this tutorial.
Before setting up your configuration, please note the following recommendations:
- Some of these Zebra options are identical to options that are already present in the TinyMDM policy (e.g. the ability to disable Bluetooth). We invite you not to set these options in the Zebra configuration to avoid conflicts on the devices.
- Several of these Zebra options can allow you to block important device settings. We therefore invite you to use them with caution, keeping in mind that if a device is no longer connected to the Internet and these options cannot be restored to their original state, the device will be unusable. As these options are not managed directly by TinyMDM, we will not be able to intervene to unblock a device in this case.
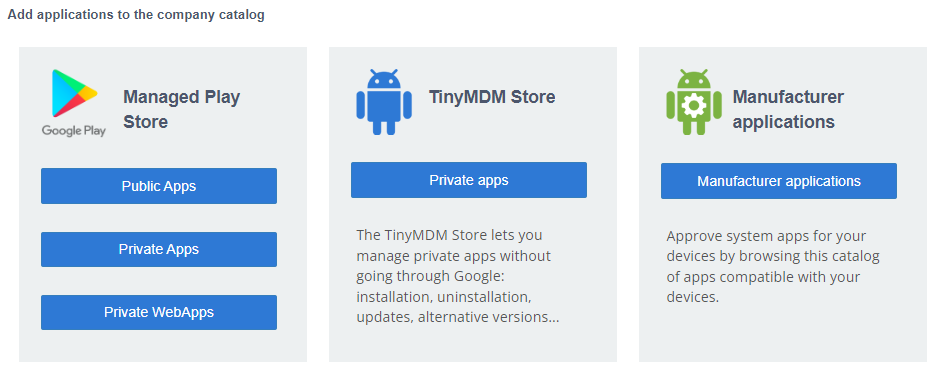
1) Approve the Legacy Zebra OEMConfig application in the Play Store
In the Enterprise Approved Apps tab, pull down the Apps Management part and click on Public Apps.
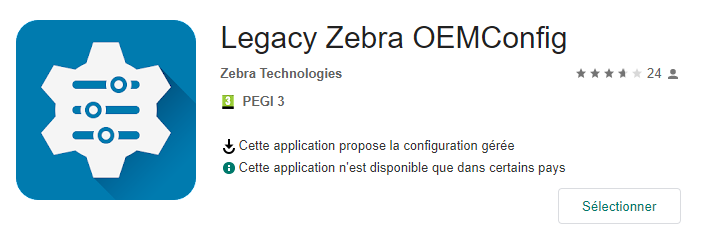
On the Play Store, enter com.zebra.oemconfig.common (without space) in the search bar, click on the first application that appears: Legacy Zebra OEMConfig, then click on Select and approve it.
2) Approve and install the Legacy Zebra OEMConfig application in the policy
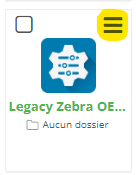
In the Policies tab, go to the policy where you want to enable the remote control on Zebra devices (you will have to repeat the manipulation on all the policies for which you want the control on the Zebra devices). Pull down the Apps Management tab, then in the list of approved applications, find the ‘Legacy Zebra OEMConfig’ application, click on the menu at the top right of its icon and click on Approve. Click again on the menu at the top right and click on Install.
3) Configure the Legacy Zebra OEMConfig application
Use again the menu at the top right of the icon and click this time on Configuration. Once the managed configuration is opened, click on the Add new group button.
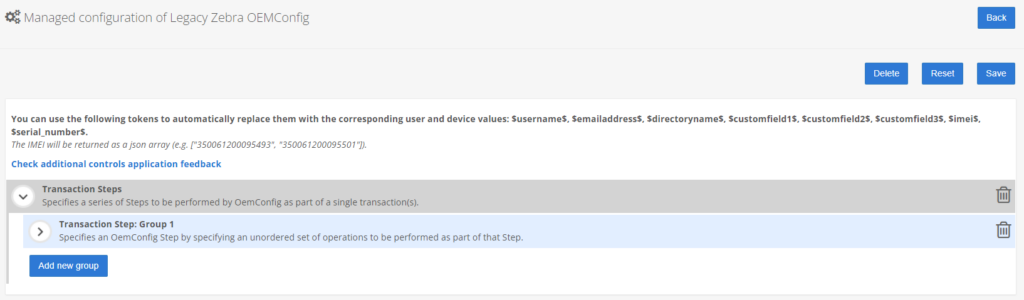
A Transaction Step: Group 1 tab opens. Scroll down to the Service Access Configuration sub-tab and open this sub-tab.

Enter the following parameters (case-sensitive, no space):
- Service Binding Action : Allow
- Allow Service Identifier : com.zebra.eventinjectionservice
- Service Caller Action : Allow
- Allow Service Identifier : com.zebra.eventinjectionservice
- Allow Caller Package : com.pdlp.pro.android.app
- Allow Caller Signature
MIIC1TCCAb2gAwIBAgIEWTuFITANBgkqhkiG9w0BAQsFADAbMRkwFwYDVQQKExBBcnMgTm92YSBTeXN0ZW1zMB4XDTE3MDMwNjA5NDIzMloXDTQyMDIyODA5NDIzMlowGzEZMBcGA1UEChMQQXJzIE5vdmEgU3lzdGVtczCCASIwDQYJKoZIhvcNAQEBBQADggEPADCCAQoCggEBALg6UM9rpKiR27PlVIHQgkLeSOjx484ykfRPtlHAU6WtJi/zKJW4lkf0+GJghZ1PqdYEWx8JZAq82YfooEUbeDmNsp2fxcxKfiYBCEoxlrCQ+gTWYIvsPhU4VNRovwaxnn7M7XQPnoNmCaRsee9VrOSo05fB2+uiqKmb7glkDg04sfkxAQP5VfecaOHEAU/SfbiuWXEt6usrmj9JKPNzg/dpwIGliaIaV+BDZms0P1kxui30BSz6ZHW6Adpv0x9cZaMIYDApKCboaIQioB6yQ9rvglgTVKr+B9pjhOOv1vurnTvcTFlkEdrjCV8bnPPdhMwEt9tikbYsA8M48PllC0cCAwEAAaMhMB8wHQYDVR0OBBYEFI45dH/fbv3yxmtybTCOmCQPbePdMA0GCSqGSIb3DQEBCwUAA4IBAQCsdFXTtbaw3iyBYgNUZUxdi8MN8LNedHVrgfm/CIcn9ubeH/8P2y+5wo1Ynb60XKG8zMgs+tcMXC1Scp63KrPInfhZdrqHRK4St3W1frSDq2CJWwenRaaEv0aSADMmQ33yED+H1YTFHCq8qyfK65o49kQRGbT1x1g8BpBin6uW4gtB5/opPVuNcHEEmV7VioCLbYaO0idUI2xwW3ffKBxjP7Rl8ZS+WdwbYzSW9Np6gPh5/r4fd0xNOI1zbpMsp4ZwdM99QRuXzovuPyEBWj344gWCBGtmX+H7mU2ag68B8sQeL8RIGoPRG4JLRNzA9EEr026XT6X/RVFj548mIUtl

Once the configuration is complete, scroll to the top of the managed configuration and click on the Save button.
4) Test the remote control on your Zebra devices on Android 10 or –
From your dashboard, go to the Devices tab and click on remote view icon on the device you want to visualize. A window will open in the TinyMDM console, and at the same time a popup will appear on the device, requesting the user authorization. Once permission has been granted by the user, you can act remotely on the device.