How to configure Chrome to access only one or multiple websites?
This tutorial is intended for administrators who want to provide access to an internal portal or http site for example, which is not compatible with the use of the web application. If your goal is to configure Google Chrome in conjunction with TinyMDM internet filtering, go directly to this tutorial.
If you want to display a specific site on devices without granting access to the entire browser, you can use the Google Chrome application with its advanced configuration options. To do this:
- Connect to your TinyMDM dashboard and open the Enterprise Approved Apps tab.
- Under the Apps management sub tab, click on Public Apps. The Play Store opens, type in the search bar “Google Chrome”. Then click on Select and Ok to approve the app company-wide.
- Then go to the Policies tab and modify the policy you want. On the Apps Management sub-tab, in the Policy approved apps, click on the Google Chrome application icon to approve it.
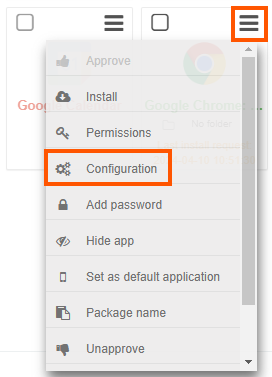
- Click on Google Chrome’s menu and then on Configuration.

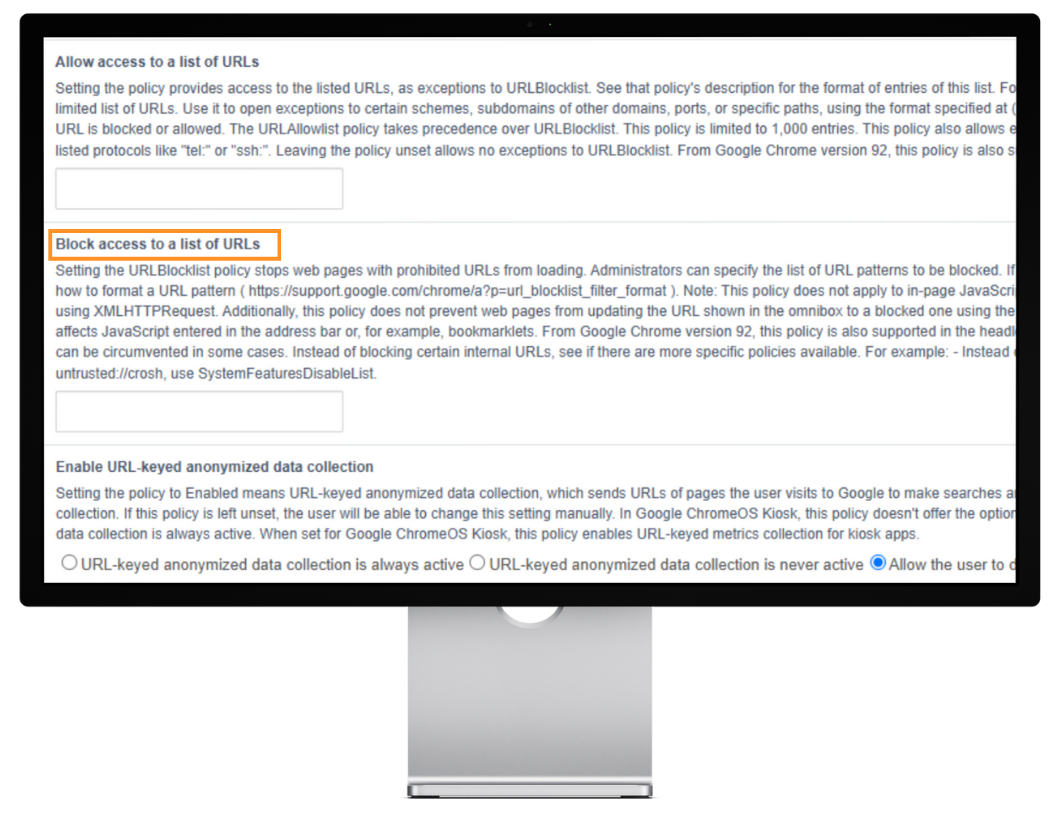
The Managed Configuration page appears. Find the line Block access to a list of URLs then copy and paste the text below:
["https://*", "http://*"]
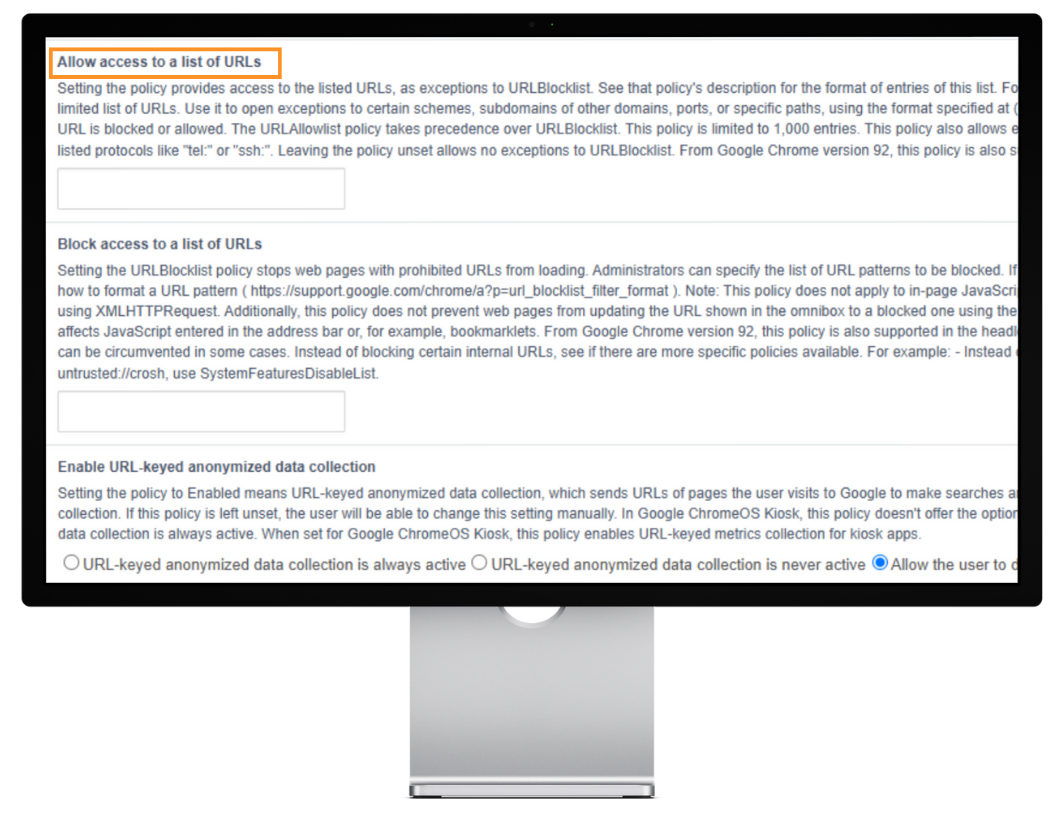
By entering this text, the user will not be able to access any websites when connecting to Google Chrome. As the aim is to give the user access to one or more specific sites, search for the line Allow access to a list of URLs (just above ‘Block access to a list of URLs’).

Then copy and paste the URLs you want in the formats below, depending on whether you have one or more sites to make visible.
- If you only have one website to enter, enclose the URL of your web application in quotation marks and put the whole thing in square brackets:
["https://www.siteweb.com"]- If you have several websites to enter, enter the URLs of your web applications one by one. They should all be enclosed in quotation marks and separated by commas. Once you’ve entered all your URLs, enclose them all in square brackets.
["https://www.siteweb1.com","http://www.siteweb2.fr","http://www.siteweb3.net"]- Then scroll to the top of your Managed Configuration and click Save.
- Once the configuration is complete, return to the Application Management sub-tab of your policy. Under the Policy approved apps, click on the Google Chrome menu and then on Install if you wish to install it automatically on all devices of the policy.
