How to create users and affect them to groups?
If you don’t need to have specific users (if the devices don’t belong to anyone in particular, or if you don’t need to push configurations linked to an email address, or if the devices are shared…), you can skip this step and use our multiple enrollment feature instead. This way, users will be created automatically each time a device is enrolled, and users will be named according to their own device ID.
A. Users

1. Create users
To create users, many options exist: you can create users one by one by clicking on Add a user, or import a csv list of users by clicking on Import users (see the tutorial Import users from a CSV file using TinyMDM).
For each user, you can define:
- an email address. Ex: john.doe@demo.com
- a name. Ex: John Doe
- a directory name (important to configure an email account for example). Ex: john.doe
- three custom fileds. Ex: for phone numbers etc.
If you don’t want a user to be linked to an email address, you can click on Anonymous user. In this case, only its name will be required to create a user (see the tutorial Add “Anonymous” users using TinyMDM).
If you want users to receive an email with the QR code to enroll their device, you can tick Send an email to the user. You can then choose to send the QR code for enrolment in fully managed mode or in WPCO mode (work device with personnal use allowed). If you don’t want, unselect it. The QR code will still be permanently visible on the TinyMDM console.
Note: TinyMDM recommends enrolling a maximum of one device per user, so that you can easily change a device group or policy. However, the limit on the number of devices that can be associated with a single user is set at three. This limit can be useful, especially for users with two or three devices on which an email application is configured via TinyMDM with a common email address.
2. Link them to policies
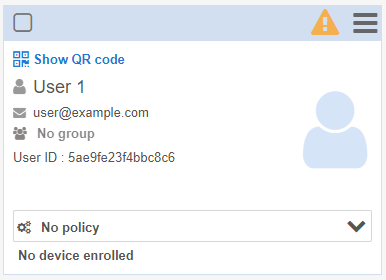
All the created users appear as cards. If they haven’t already been affected to a policy, the No policy message appears. You will need to create a policy from the Policies tab and affect one or multiple users before being able to enroll the devices linked to it. If needed, follow this tutorial to create a policy.

B. Groups

1. Create groups
In the sub-tab Groups, you can create groups and affect users to them. To do it, click on Add a group and rename the created group.

If you already have a policy and you want to apply it to a group, click on ![]() and select the policy of your choice. All the users of this group or the ones you will add later in this group, will have mobile devices linked to the same policy.
and select the policy of your choice. All the users of this group or the ones you will add later in this group, will have mobile devices linked to the same policy.
2. Assign users to groups
To assign a user to a group or change its group, follow the steps:

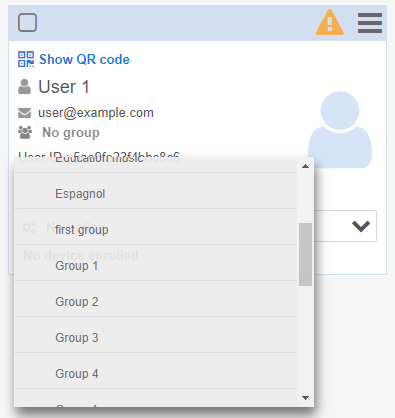
- On the User’s card, click on the No group text (or on the group name, if the user is already part of a group). A text box will appear.
- Groups’ names that already exist appear on a list.
- You can select an existing group or type a new group’s name in the text box and use the Enter key on your keyboard to create a new group.
Be careful: if you assign a user to a group, its policy will be the one of the assigned group.
