
How to remotely configure an APN with TinyMDM?
An Access Point Name (APN) is the name of the configuration that your mobile phone reads to establish a gateway connection between your provider’s network and the public internet. It contains all the details your device needs to connect to a specific mobile data network (your SIM card operator’s network). Many phones self-configure when a new SIM card is inserted and attempts to connect to this new operator’s network. However, this does not always happen, and in such cases, the APN must be configured manually.
A . How to configure an APN?
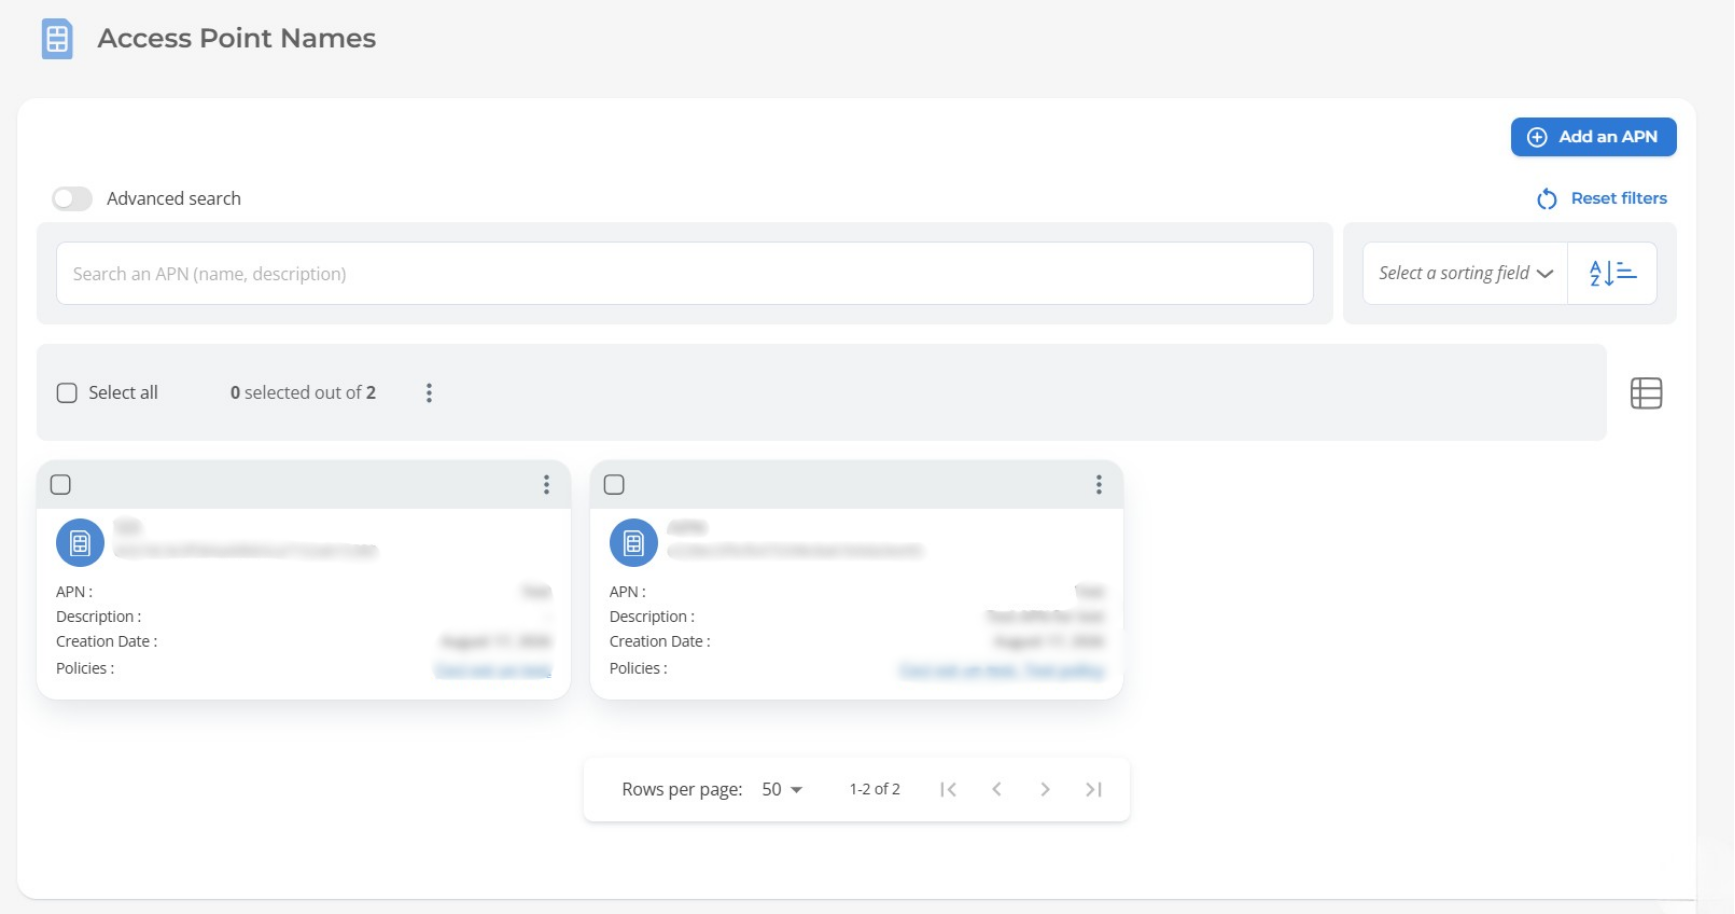
1. Log in to your administration console and open the APNs tab:
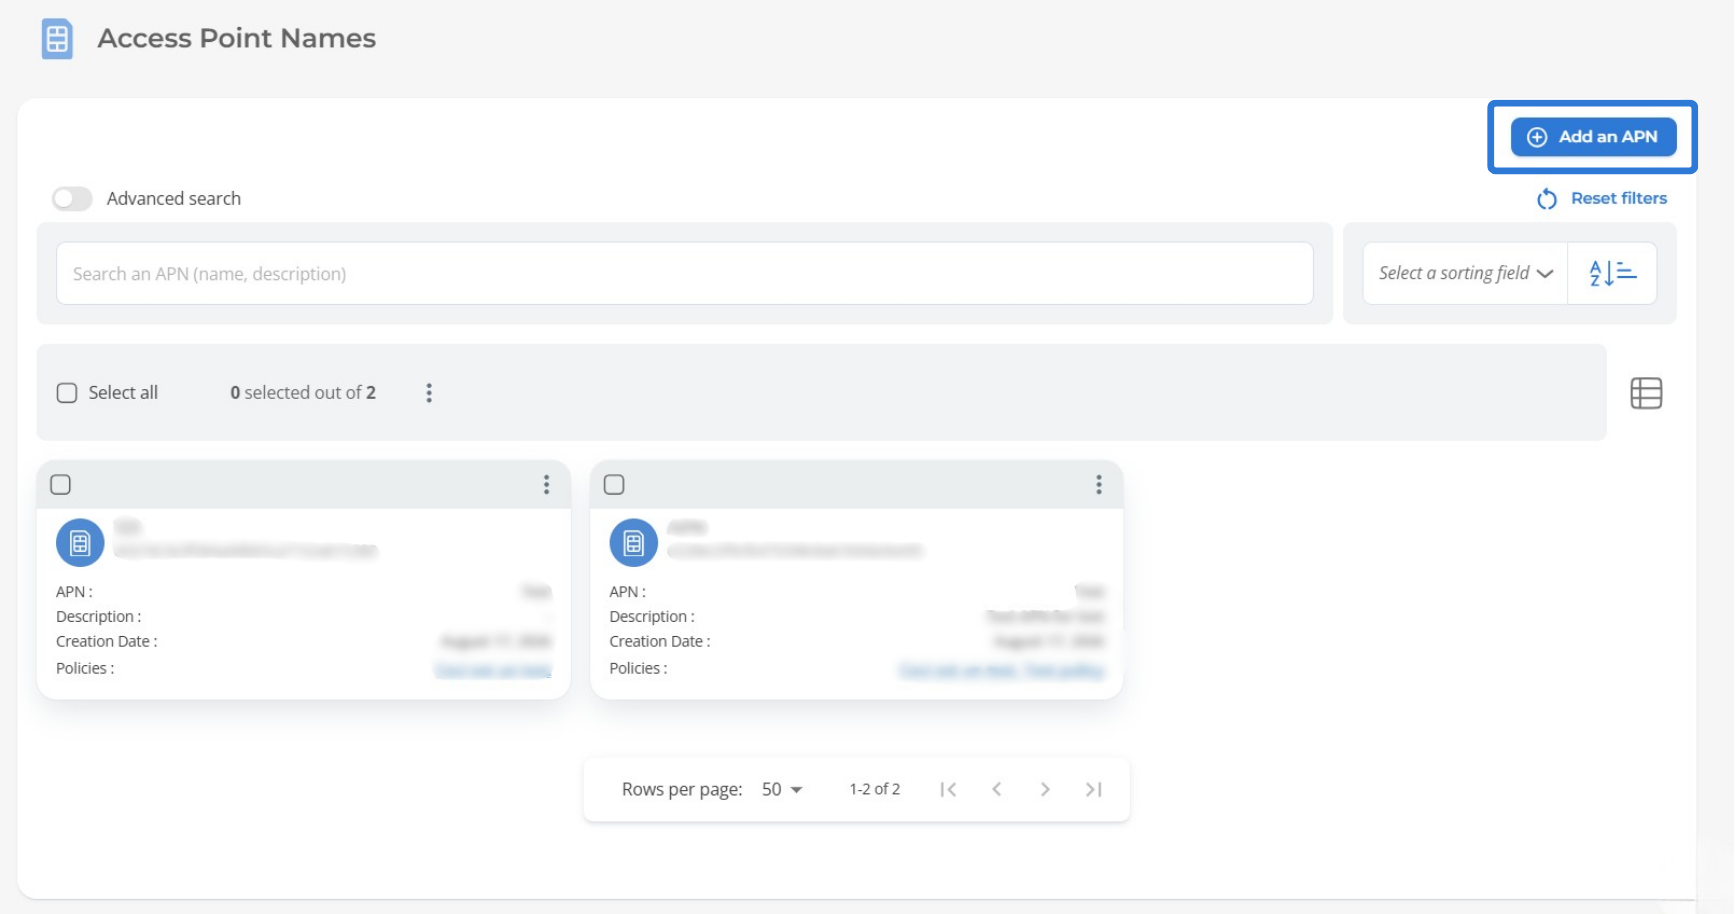
2. Then, click on Add an APN:
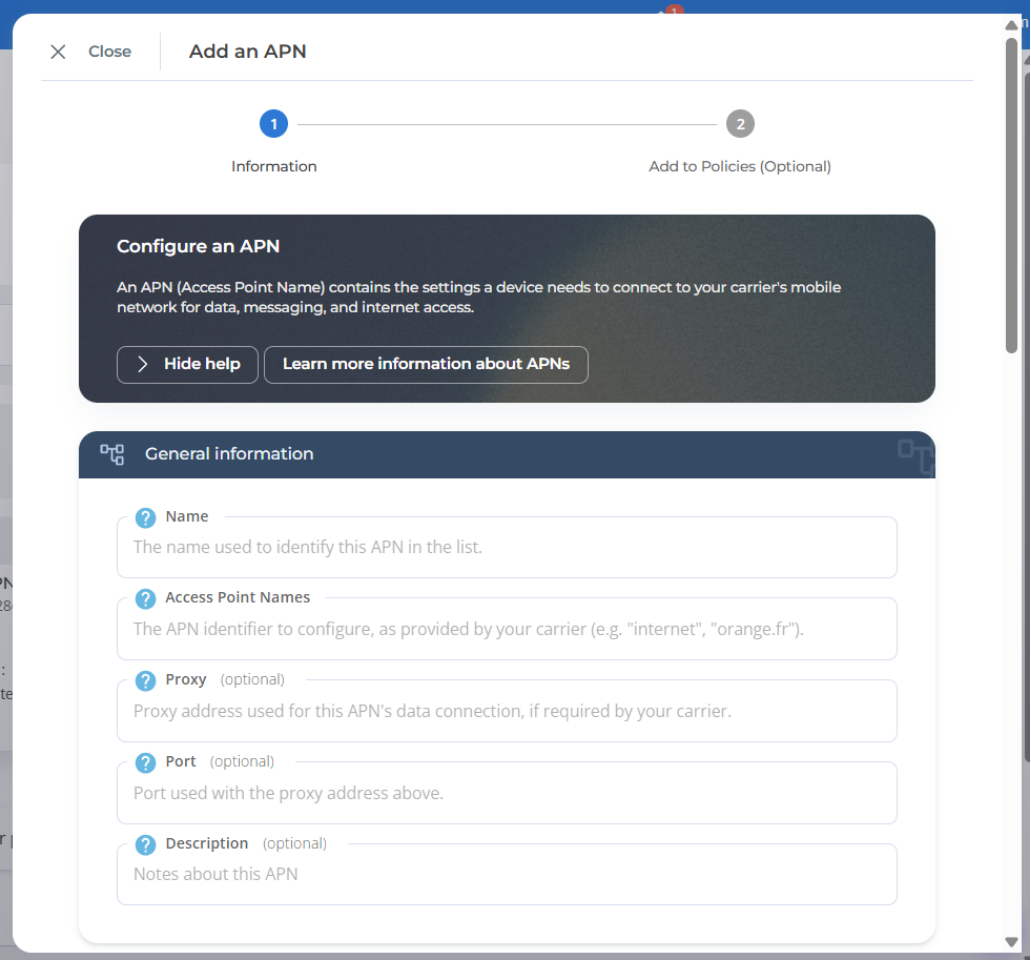
3. On the pop-up that appears, fill in the required information to configure your APN:
- The Name field allows you to define a name to recognize it in the list of all your APNs entered on TinyMDM.
- Regarding the other fields, contact the mobile operator who provided your SIM card so they can give you the information required for your configuration.
- Next, click on Next Step at the bottom of your pop-up.
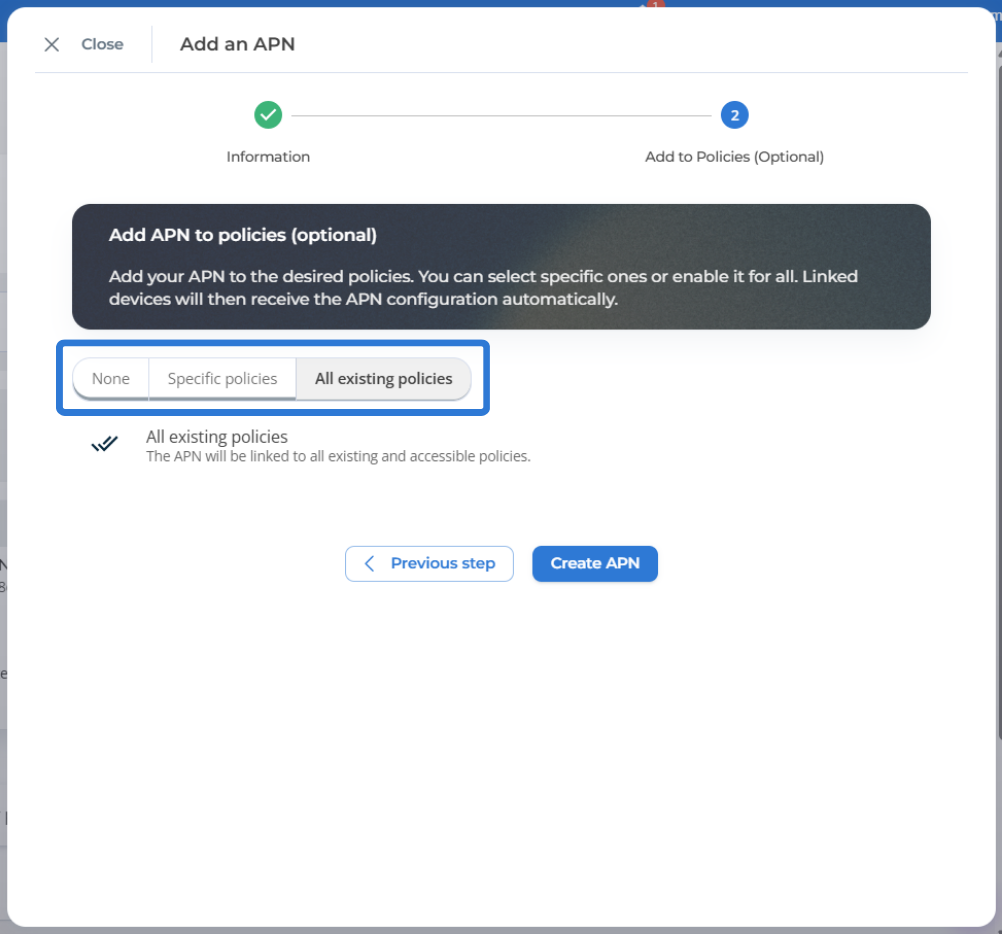
4. You can then choose to automatically add your APN to your policies. By default, your APN is not associated with any policy, but you simply need to click on Specific policies to associate it with one or more policies, or click on All existing policies to associate it with all your policies at once (as seen in the screenshot below).
B. How to deploy the APN on enrolled devices?
Please note:
- If, at the time of your APN’s creation, you associated it with one or more policies, then it is automatically deployed to the mobile devices associated with your policies. You do not need to do anything else.
- If, at the time of your APN’s creation, you did not associate it with any default policy, then follow the steps below.
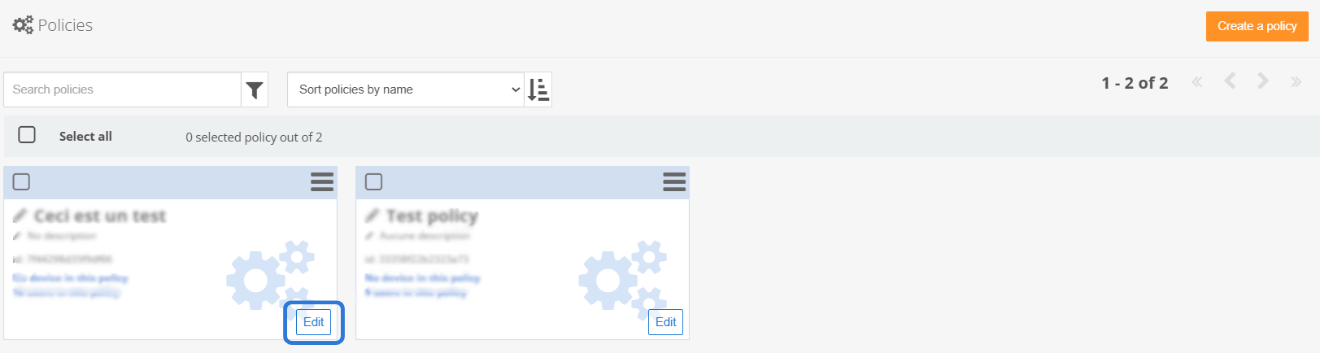
1. Log in to your administration console and open the Policies tab. Then, open the policy you wish to associate your APN with by clicking on Edit. If you need to associate your APN with multiple policies, you will need to repeat these steps for each policy.
2. Once in your policy, go to the Connectivity management menu, and under Select preconfigured APNs (Android 9), check the APN you wish to deploy to your mobile devices.
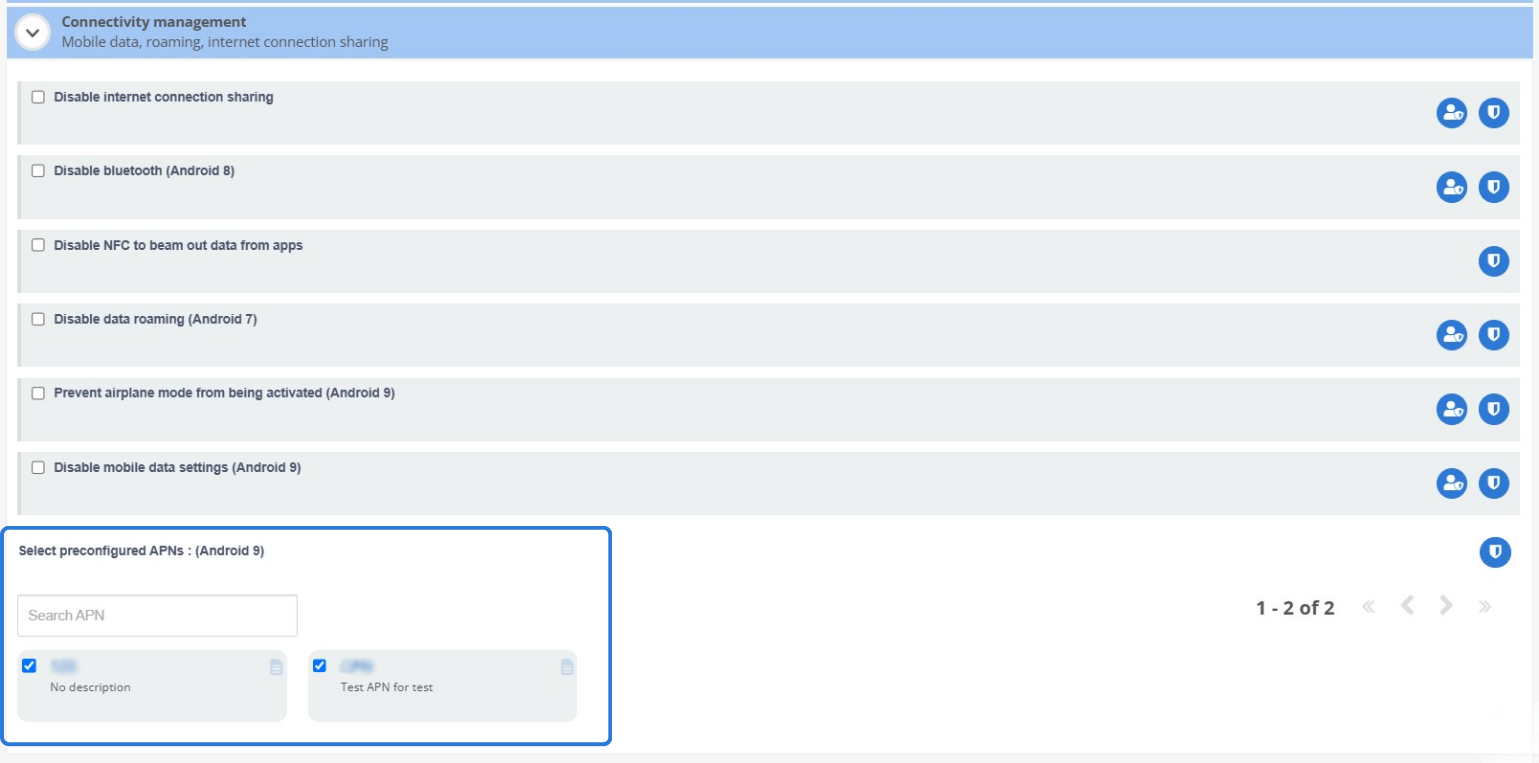
Your APN will then be automatically deployed to the mobile devices included in this policy.
C. How to edit an APN?
1. Log in to your administration console and open the APNs tab:
2. Then, click on your APN’s menu ( ) and then on Edit APN.
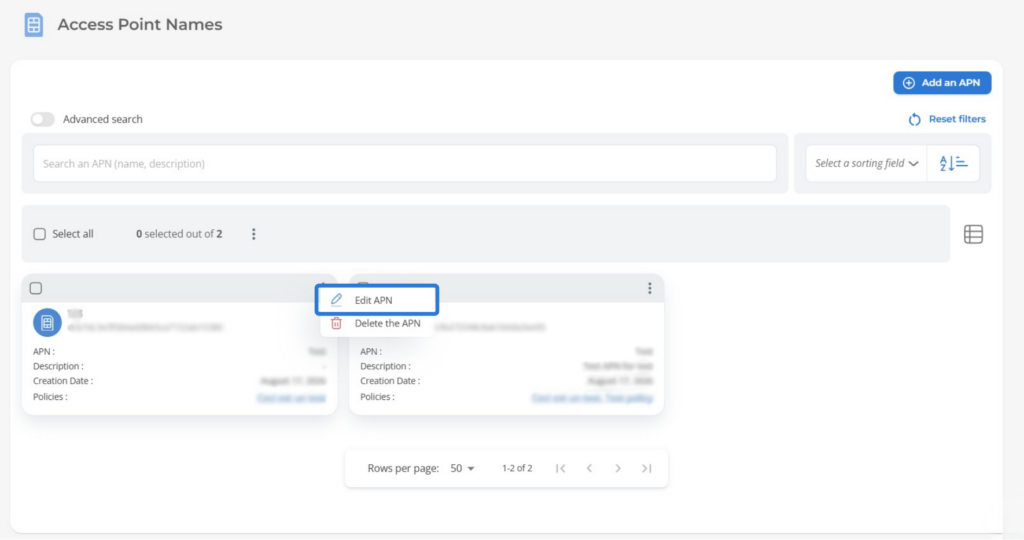
3. Next, modify all the desired fields and click on Update APN. The changes will then apply automatically to the affected devices.
Important : When modifying an APN already in use by devices, they must temporarily have another network connection. Without an alternative connection, they will lose access to the mobile network and will no longer be able to receive the new configuration, thus requiring a manual reconfiguration.